Adding Personalization to Products (Personalized)
NOTE: This feature is only available on select stores as part of a trial.
With the Personalization feature, you can allow customers to customize certain aspects of a product to their liking before placing an order. On PODSach, you can easily add personalization to a new product or an existing product on your store, as outlined in this guide.
Article Contents:
- Introduction
- Important notes before creating a personalized campaign
- Creating personalization for a product
- Editing Custom Fields
- Uploading a design template
1. Introduction
Section titled “1. Introduction”- To enable this feature, please contact us via the PODSACH LLC fanpage for further assistance.
- Currently, PODSach only supports the Personalization feature for 3D products created with mockup files.
2. Important Notes Before Creating a Personalized Campaign
Section titled “2. Important Notes Before Creating a Personalized Campaign”- PODSach supports creating personalized campaigns with mockups and design templates.
- You must ensure that every personalized campaign has a design template corresponding to the mockup and product you’re selling.
- The design template must include .PSD files and font files, compressed into a .zip file. (Maximum .zip file size is 50MB).
- You only need to upload the design template once for your personalized campaign. Once an order is placed, PODSach will handle both the design processing and order fulfillment for you.
- You can create a campaign without uploading a design template. However, for campaigns without a design template when an order comes in, the system will send an email and Telegram message reminding the seller to upload the design template within 24 hours.
3. Creating Personalization for a Product
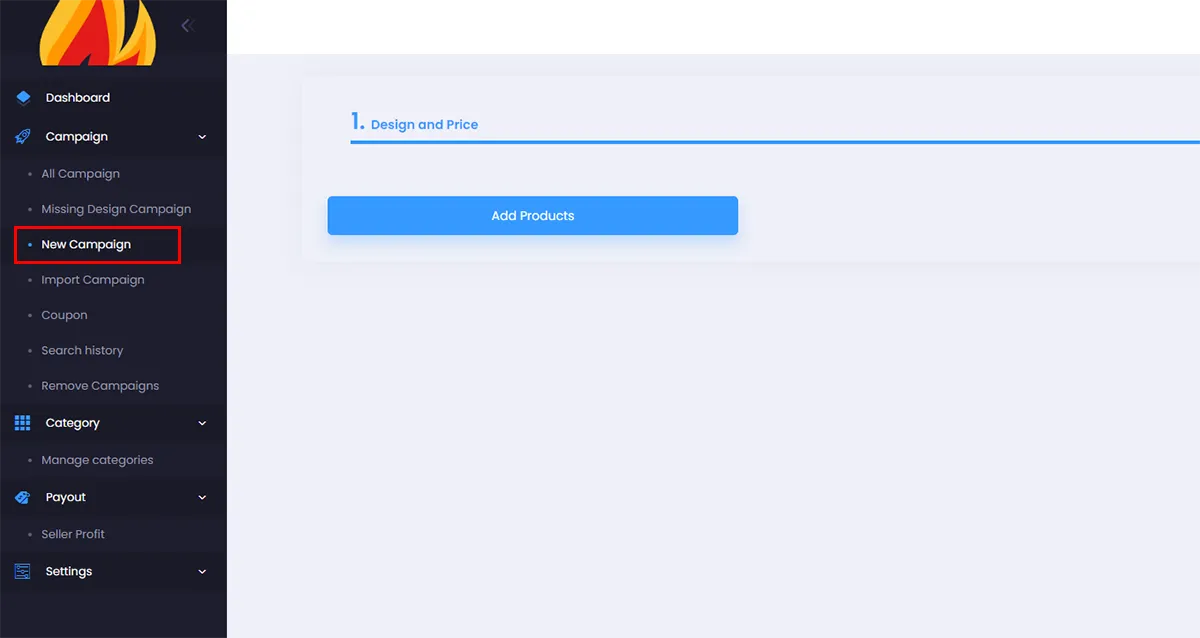
Section titled “3. Creating Personalization for a Product”- From the admin page, click New Campaign.
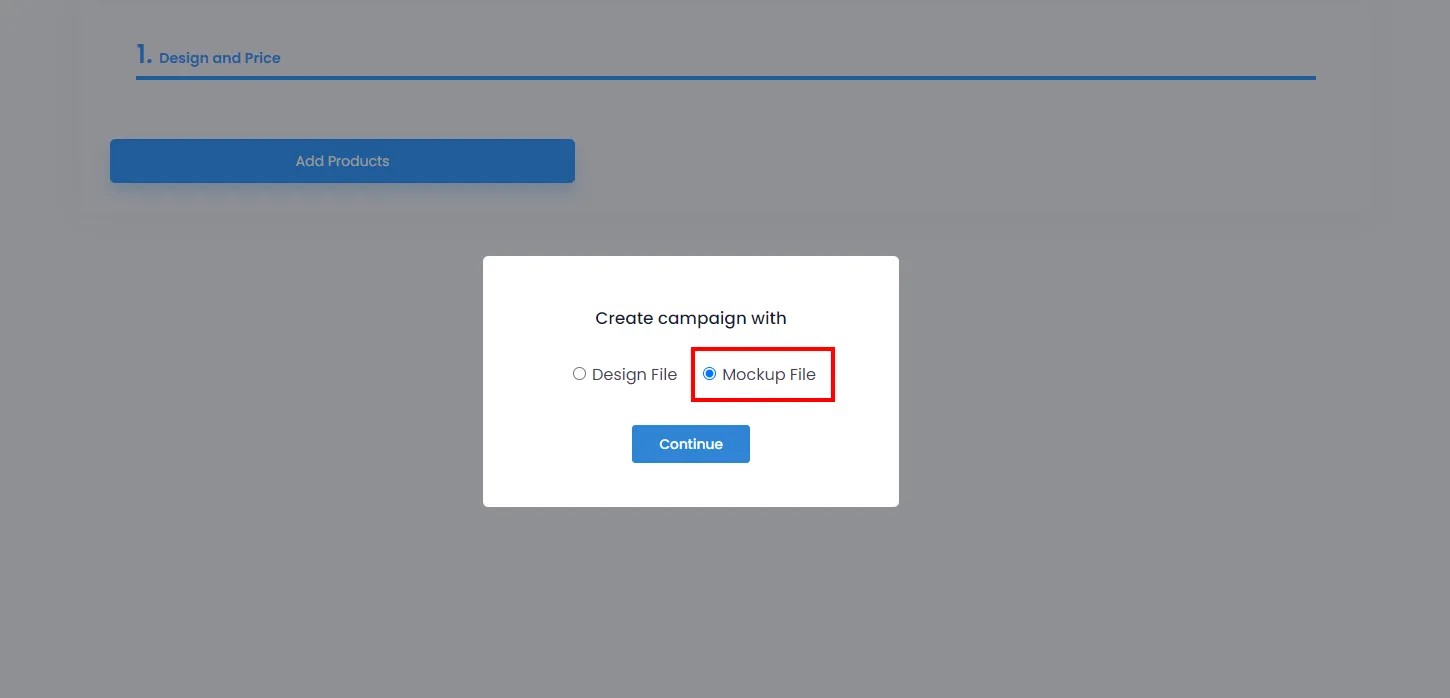
- A dialog will appear for you to choose the design type. Select Mockup File, then click Continue to proceed. (The personalization feature does not support campaigns created with regular design files.)
-
Click Add Products to add products and upload mockups for the product you want to add personalization to. Please refer to this article for more details on creating campaigns and field information on the product detail page.
-
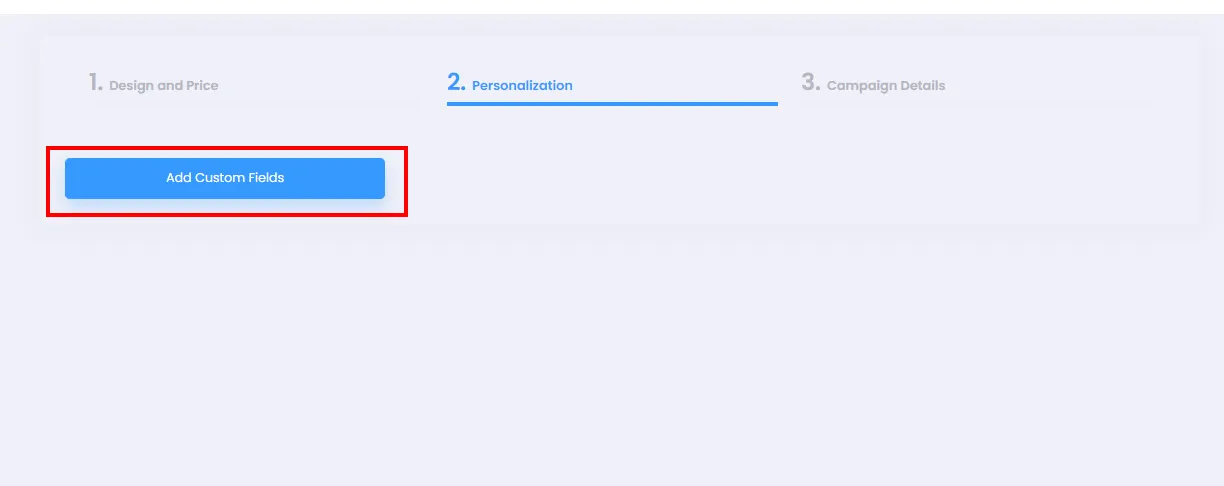
Select Personalization and click Add Custom Fields.
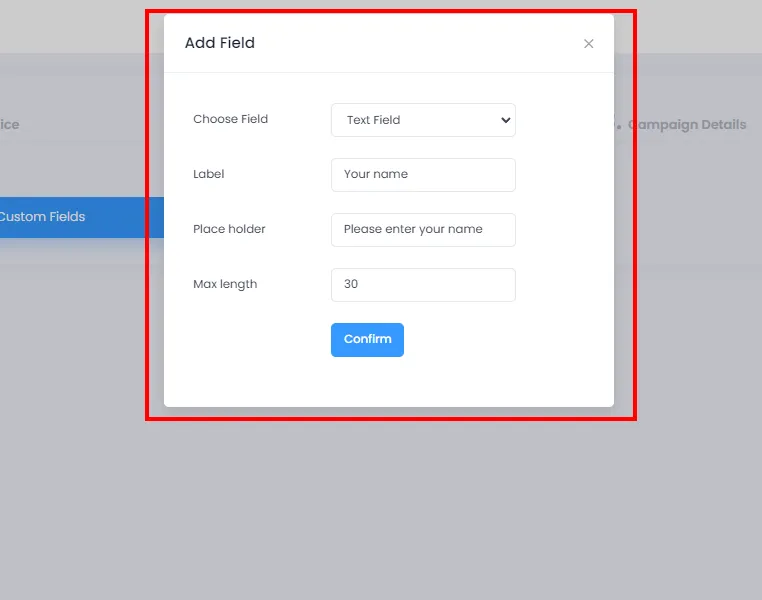
- In the Add Field dialog, fill in the required information for the personalization options.
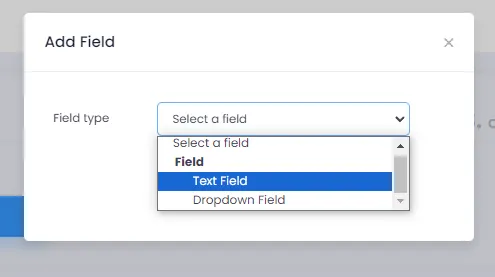
In the Add Field dialog, you can:
► Choose the type of personalization from the Choose Field dropdown. If you want customers to enter text, select Text Field.
- Enter the field name that will appear on the product page for customers to see in the Label field.
- Add placeholder text displayed inside the text field to guide customers on what to enter (e.g., name, character limits, etc.).
- Set the maximum number of characters a customer can enter in the Max length field.
► If you want customers to choose from a list of items, select Dropdown.

- Enter the field name that will appear on the product page for customers to see in the Name field.
- Add a list of items for customers to choose from. Note: To create a list, enter items separated by the
|character (e.g., Item A | Item B | Item C).
- Click Confirm to close the dialog and save your changes. The Custom Field will then appear as shown:
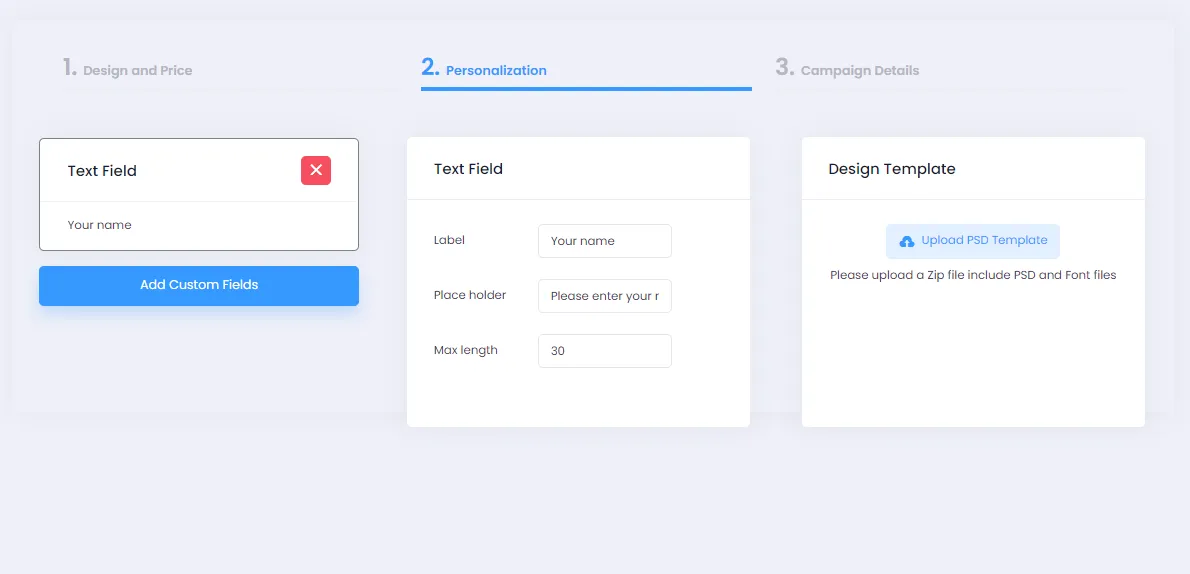
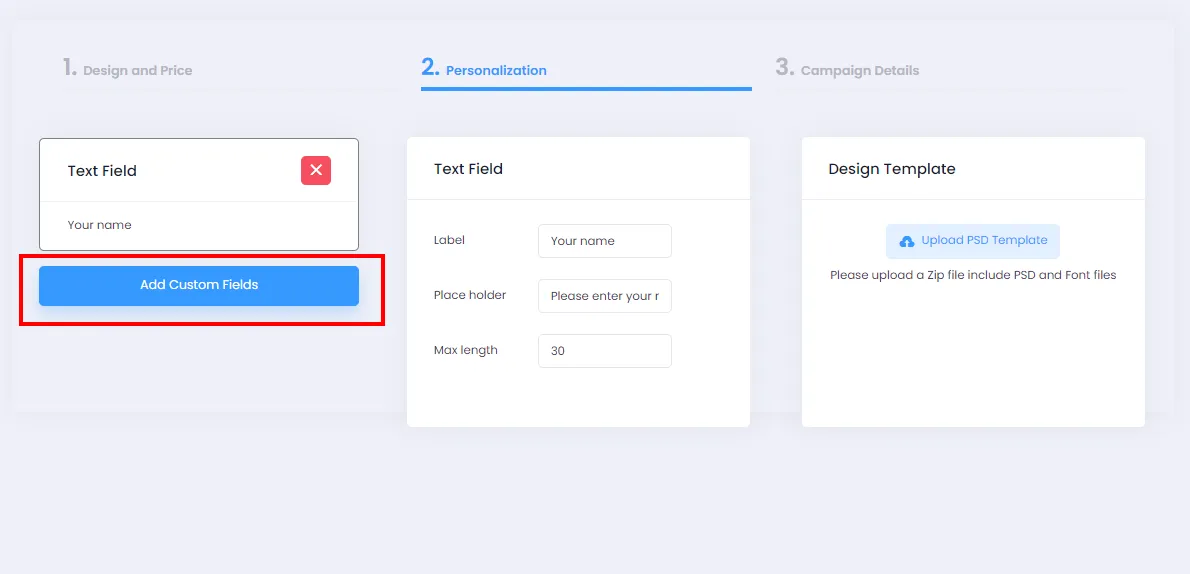
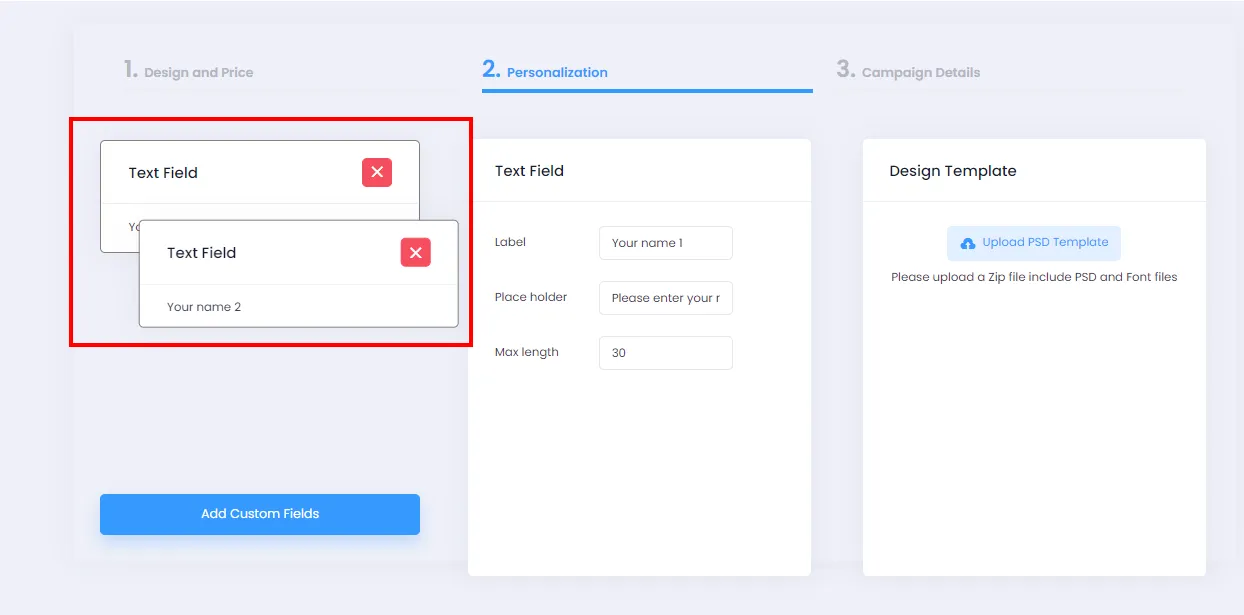
You can create additional Custom Fields by clicking Add Custom Fields and repeating the 5 steps above.
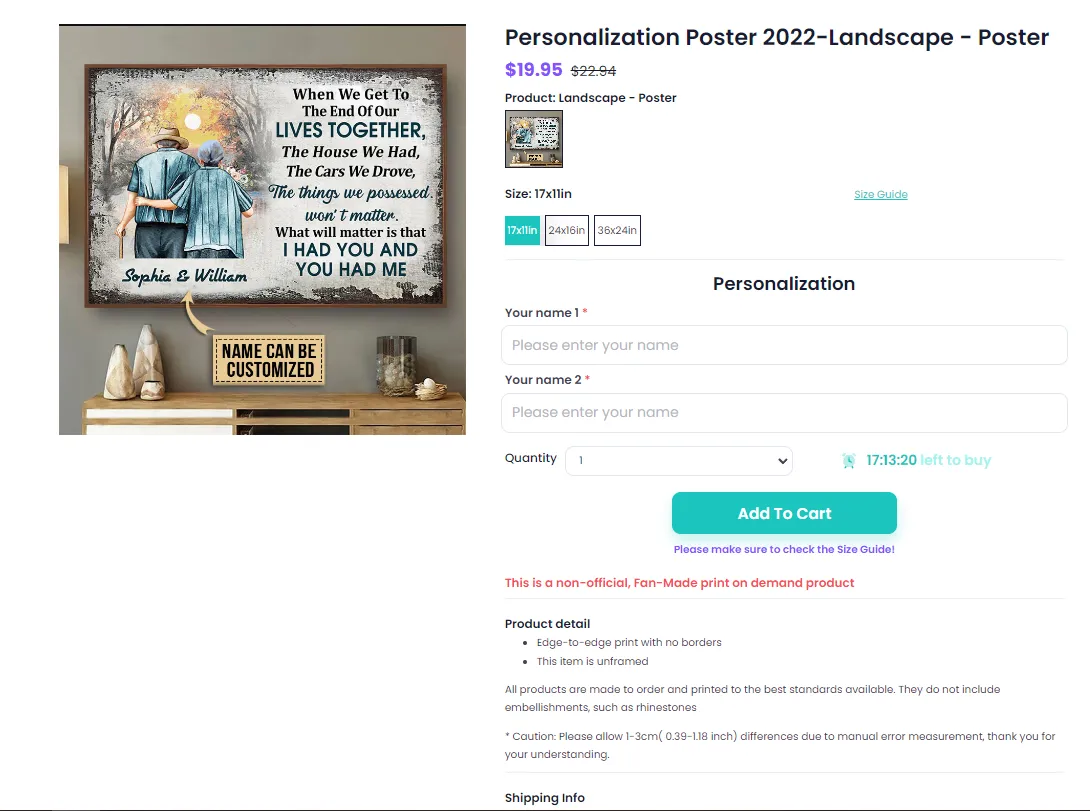
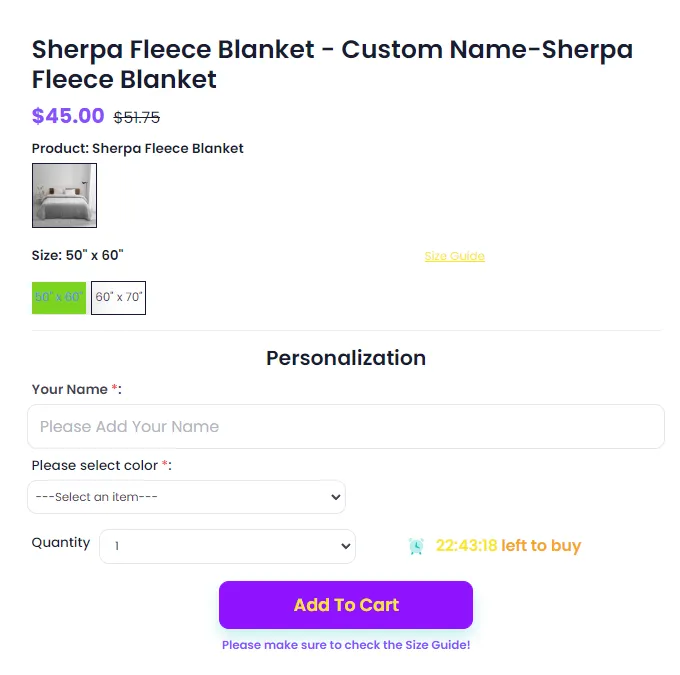
After launching the campaign, your custom campaign will appear as shown:
4. Editing Custom Fields
Section titled “4. Editing Custom Fields”-
You can reorder Custom Fields by hovering over one, clicking and holding, then dragging it to a new position in the list.
-
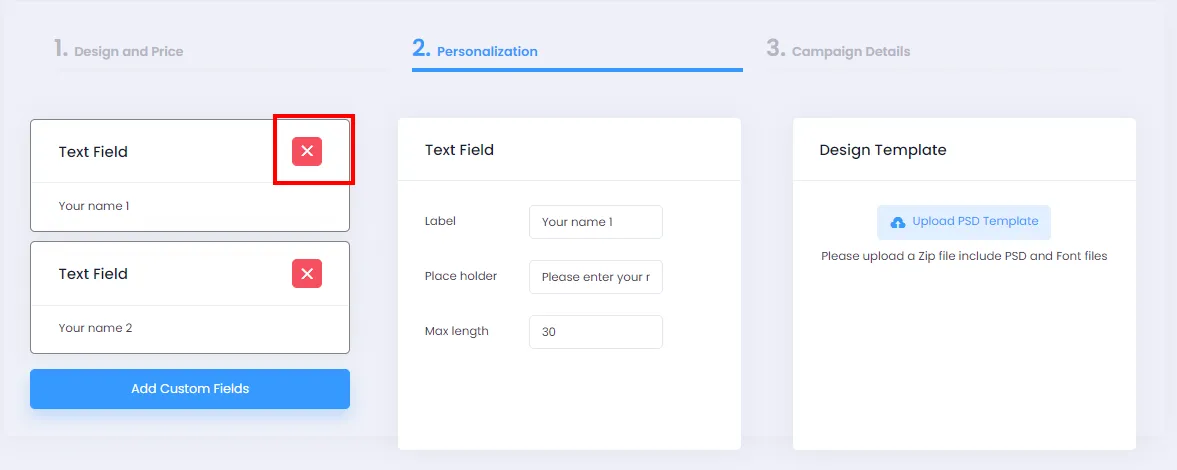
Click the X icon to remove a Custom Field.
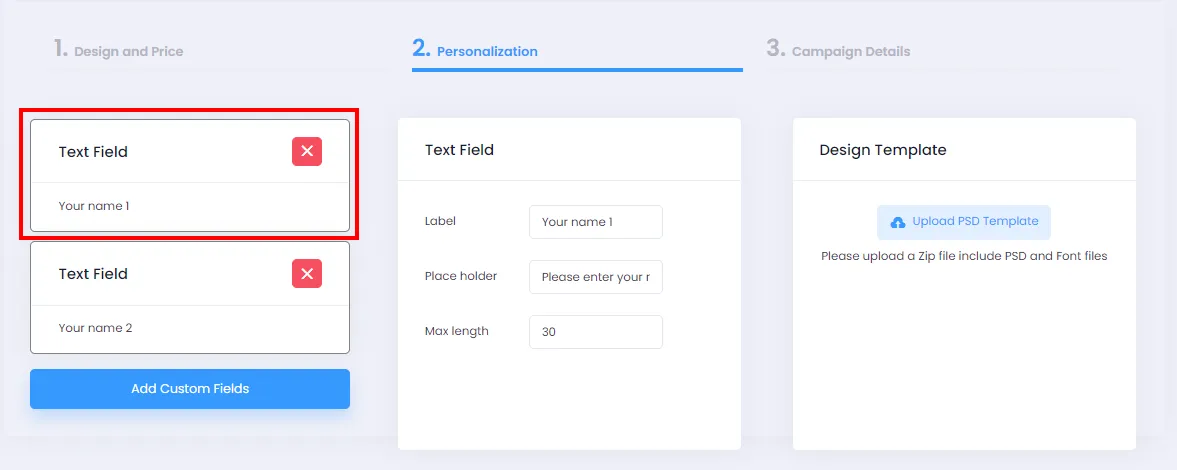
- You can also review and edit a custom field by clicking on the field you want to modify.
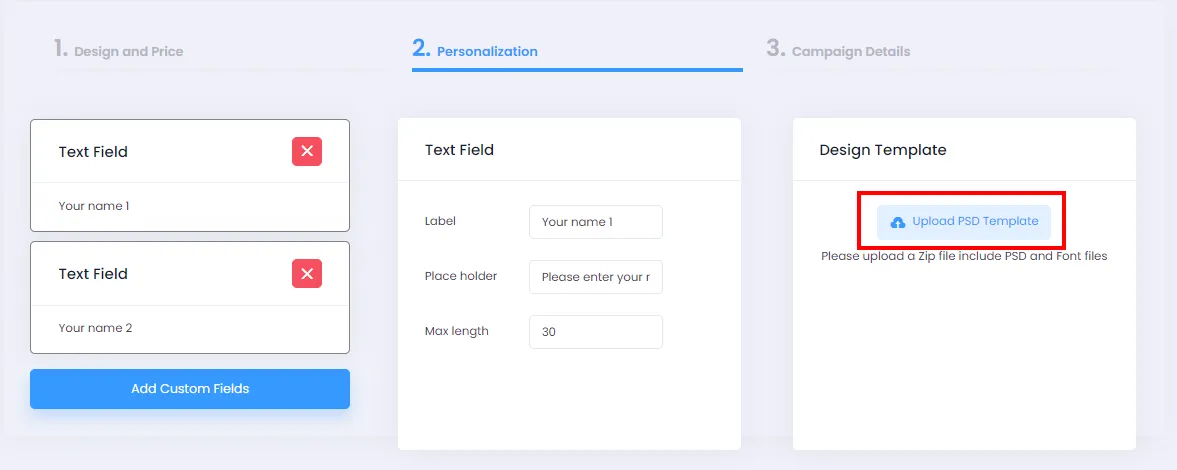
5. Uploading a Design Template
Section titled “5. Uploading a Design Template”- If you don’t have a design template yet and plan to upload it later, you can skip this section. Otherwise, upload your design template by clicking Upload PSD Template (Note: the design template must be a .zip file containing .PSD files and fonts).
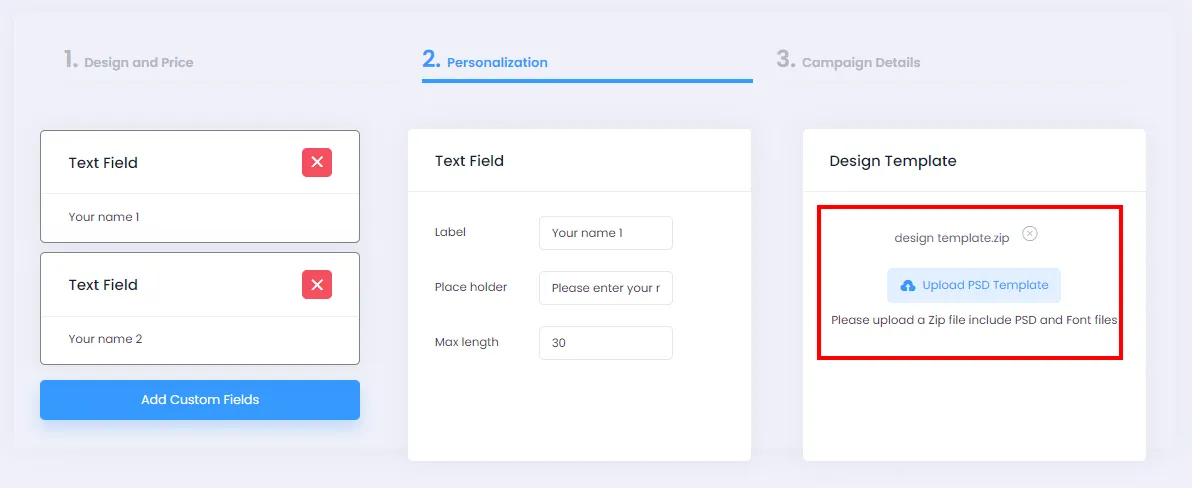
- After successfully uploading the design template, you’ll see your .zip file displayed as shown below.
- After completing all the steps above, switch to Campaign Details, fill in your campaign information as usual, then click Launch Campaign to create your campaign.
You can review your newly created personalization feature on the campaign detail page.