Importing Campaigns via CSV
⚠️ NOTE: This feature is only available on select stores as part of a trial.
Article Contents
- Preparing your CSV file
- Importing campaigns
1. Preparing Your CSV File
Section titled “1. Preparing Your CSV File”- Download the template file at: Sample link
- Detailed column explanations:
| Column Name | Required | Detailed Instructions |
|---|---|---|
| Title | Required | The campaign title. |
| Slug | Optional | The campaign URL (only supports characters from a-z and numbers 0-9). Can be left blank - the system will automatically convert the Title into a Slug after import. |
| Description | Required | Detailed description of the campaign. |
| Category | Optional | Name of an existing category in your store. If the category doesn’t exist, the system will automatically create it. To enter multiple categories, separate them with commas , (e.g., category1, category2). |
| Tag | Optional | Keyword tags for the campaign. You can enter multiple tags separated by commas , (e.g., tag1, tag2, tag3). |
| Product ID | Required | Enter the corresponding Product ID for the product you want to import. See the full ID list at: https://zii.to/podsach-import-product-id |
| Price | Required | The selling price for the product. ⚠️ Note: The price should be greater than or equal to the minimum price. If you enter a lower price, the system will automatically set it to the minimum. |
| Front mockup URL | Required | The image URL for the front mockup (Format: .JPG or .PNG, max size 2MB). |
| Back mockup URL | Required | The image URL for the back mockup (Format: .JPG or .PNG, max size 2MB). |
| Default side | Optional | Choose the default display side: Enter Front or Back (If left blank, the system defaults to the front side Front). |
⚠️ IMPORTANT NOTES WHEN FILLING IN THE FILE:
- Each row in the CSV file corresponds to one product in a campaign.
- To group multiple products into the same campaign, enter one product per row and use the same Slug. The system will automatically merge these rows.
- For fields marked “Required”, if left blank, that campaign will error out and won’t be added to the import queue.
2. Importing Campaigns
Section titled “2. Importing Campaigns”-
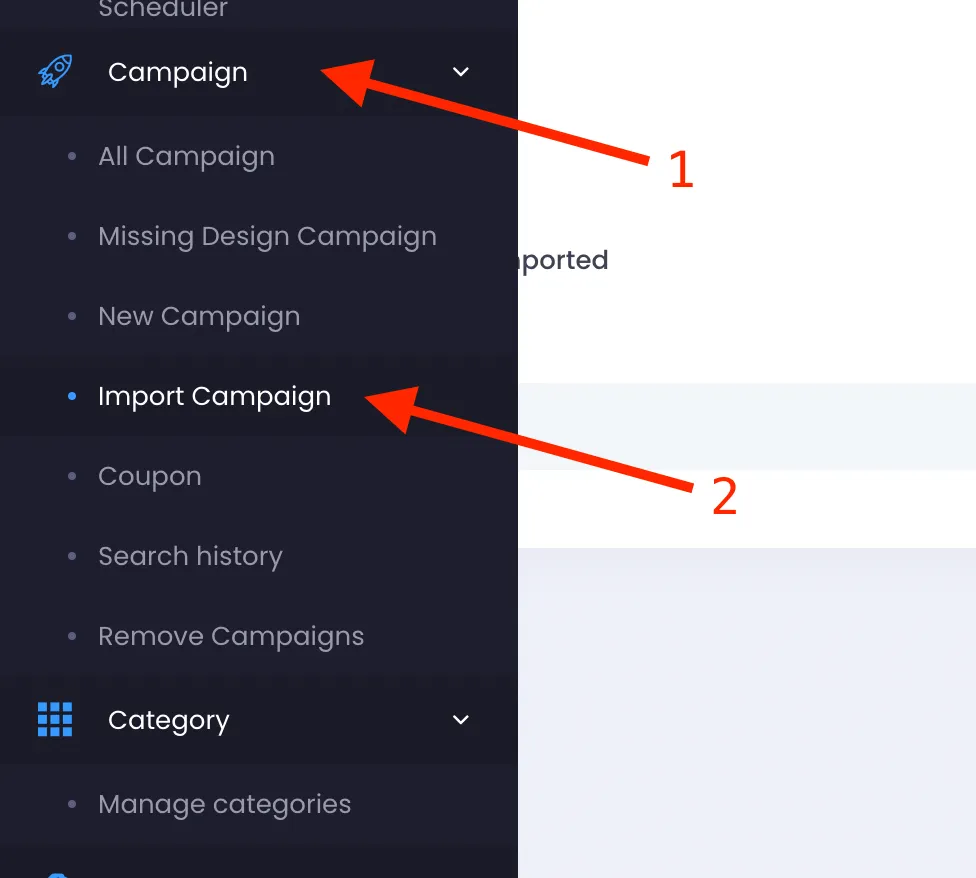
Access the Import Campaign screen from the menu: Campaign > Import Campaign.
-
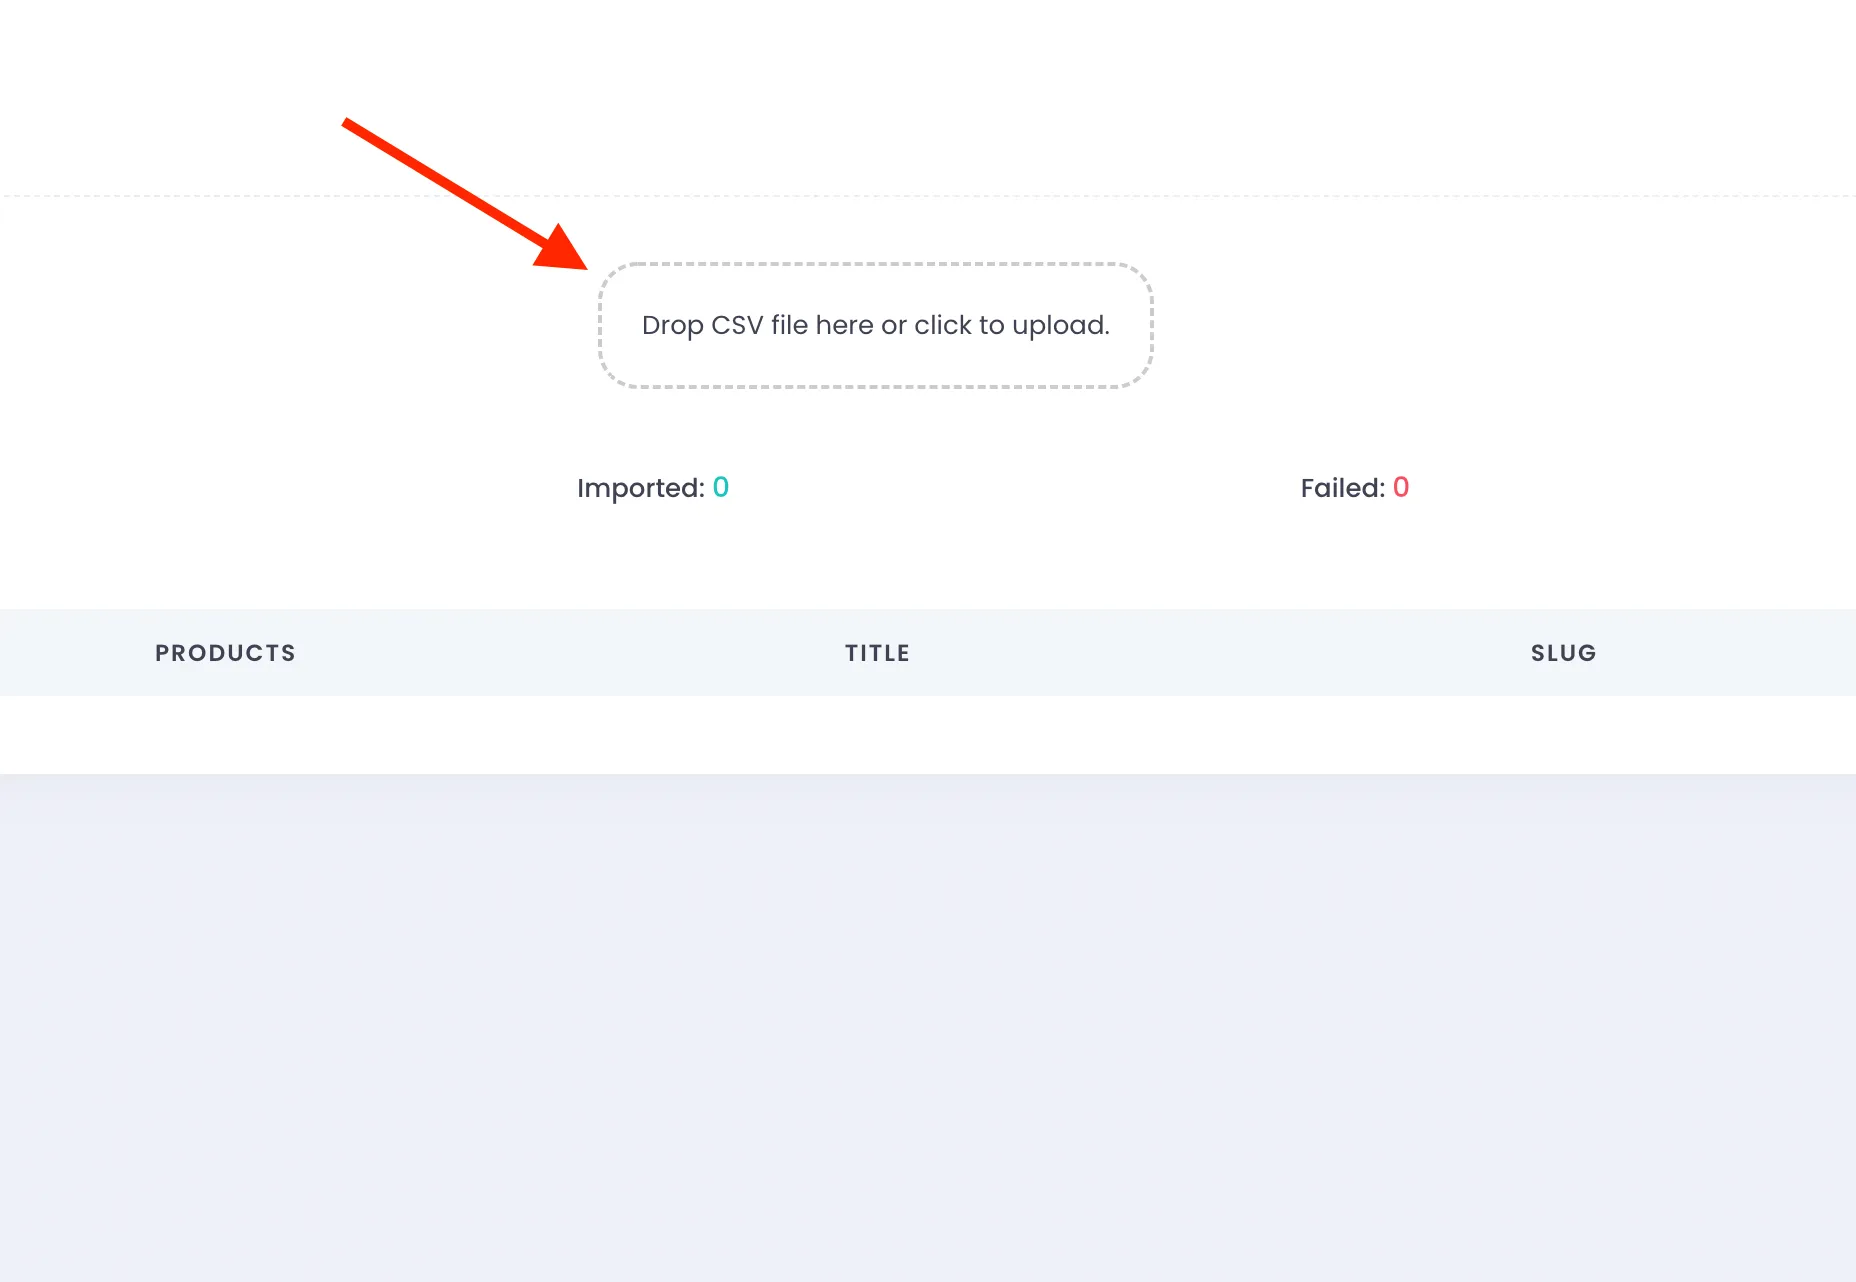
Drag and drop or select the CSV file you prepared in step 1 into the Drop CSV file here or click to upload area.
-
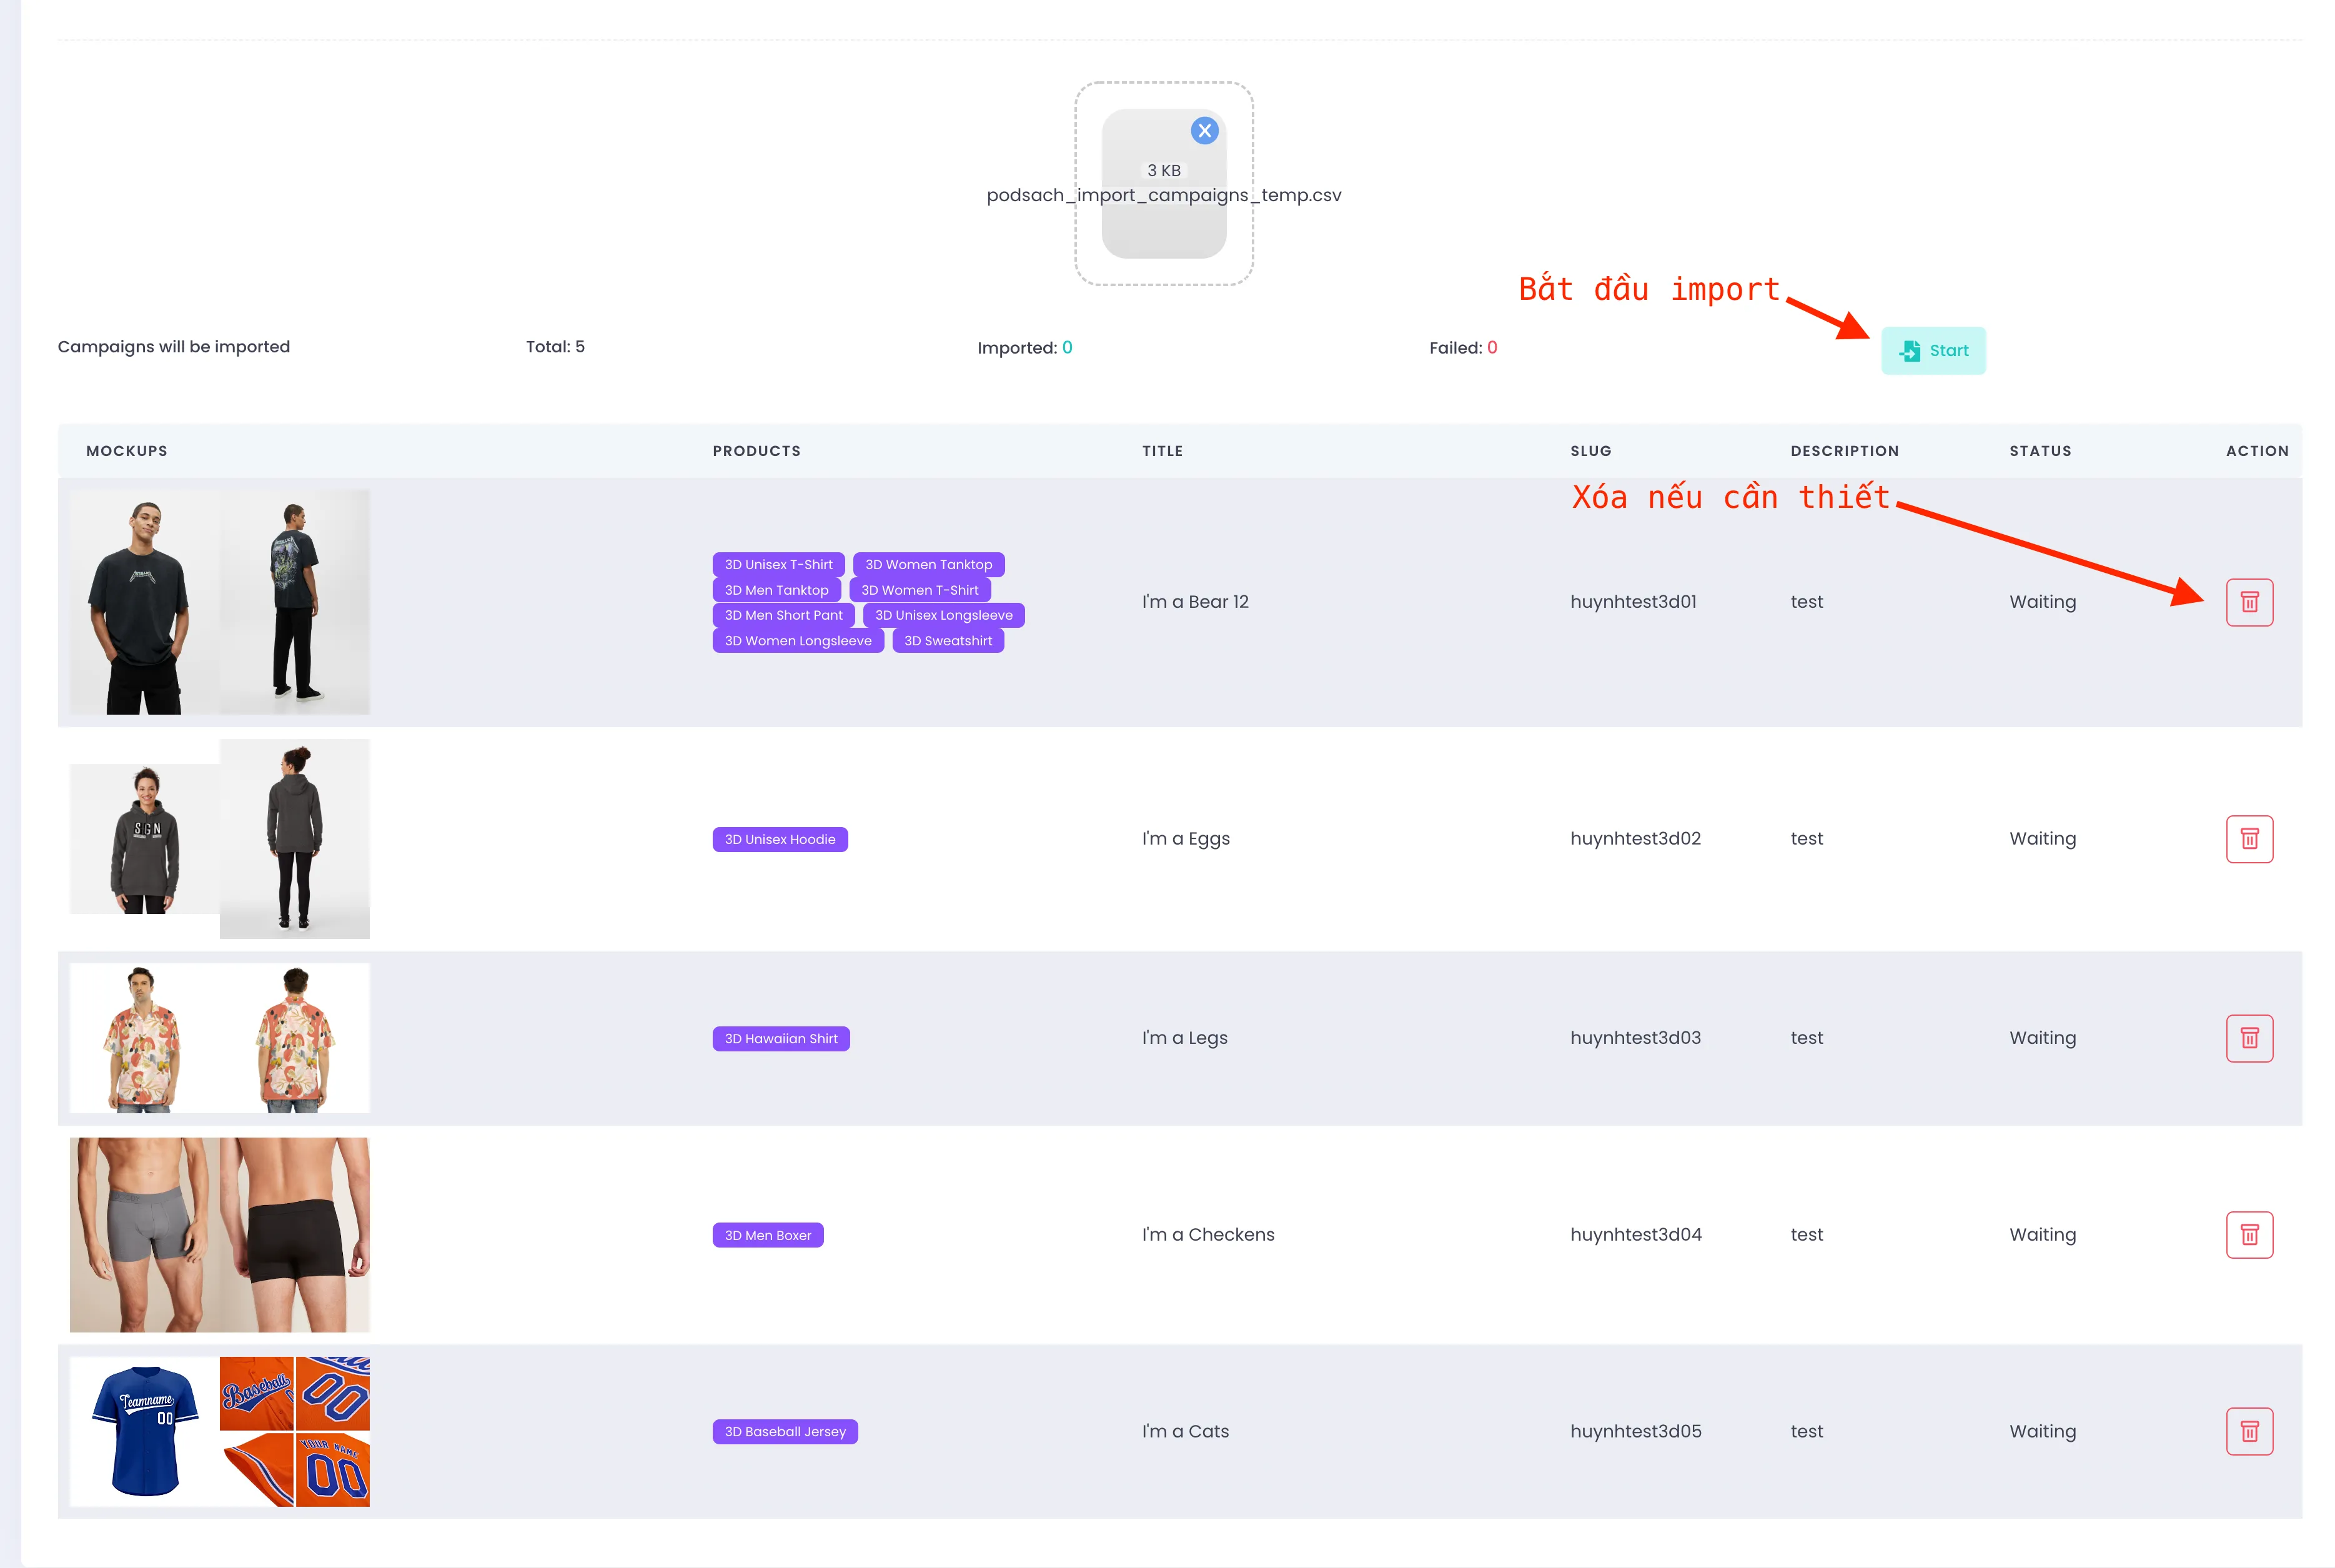
Carefully review the displayed list before clicking Start.
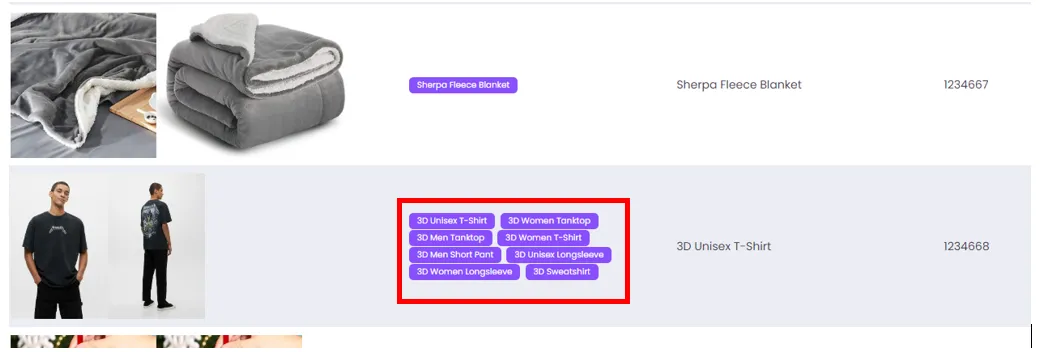
💡 Tip: You can quickly preview the mockup images of other products within the same campaign by hovering over the product name as shown below.