
Creating a Custom Campaign with Customer Image Upload
The personalization feature that lets customers upload their own images (Upload Image) is one of the most powerful conversion-boosting tools, especially well-suited for gift product niches.
With the PODSach system, you can easily set up a Custom Campaign with this feature in just a few simple steps. Here is the detailed guide:
Step 1: Create or Edit a Campaign
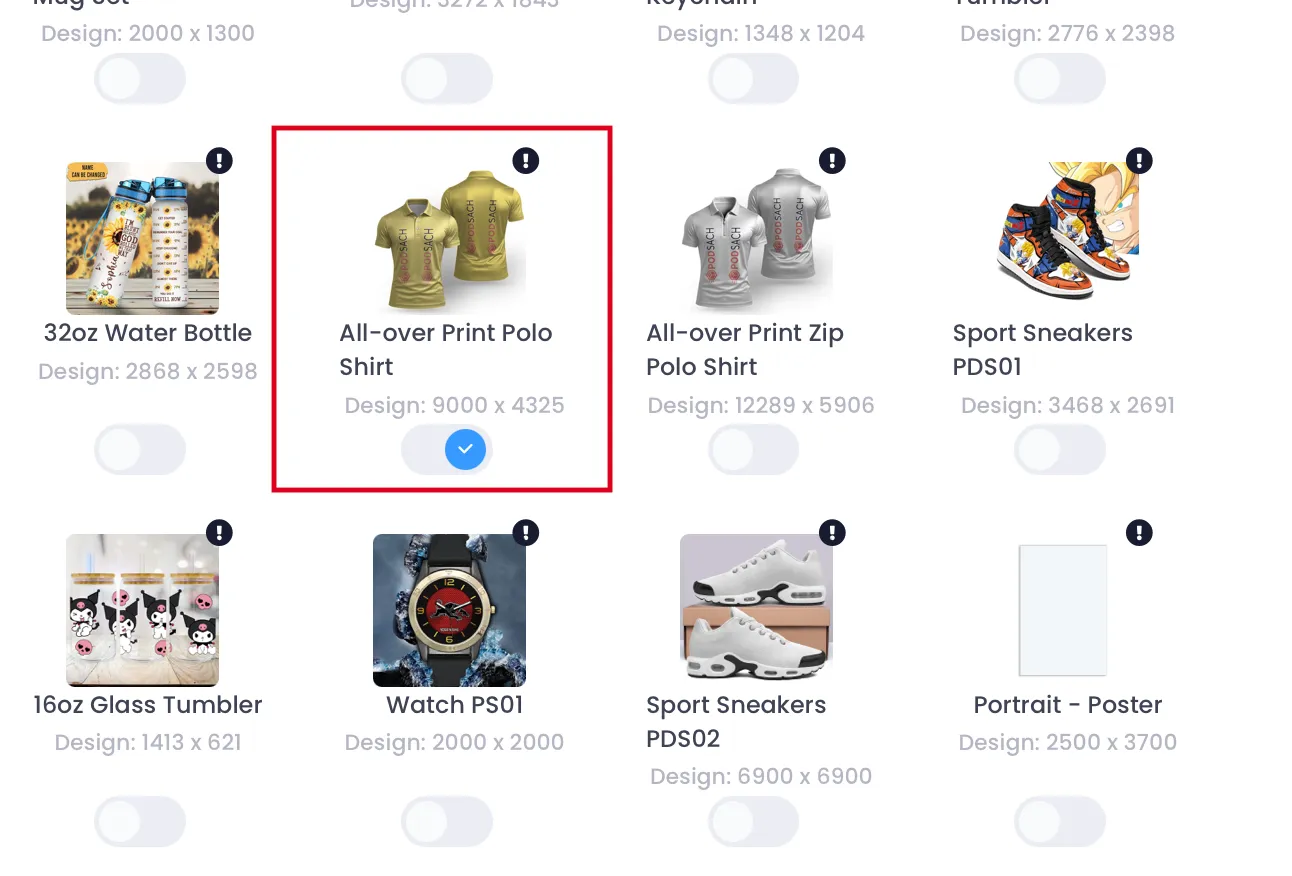
Section titled “Step 1: Create or Edit a Campaign”From the main Dashboard, select the Campaigns menu in the left navigation bar. Here, you can click Create New Campaign to start a brand new campaign → Select Create campaign with Mockup → Choose a Product.
💡 Note: Custom campaigns currently only support mockup-based campaigns and must be enabled by an Admin. You can learn more about the feature enablement policy by contacting the PODSACH LLC fanpage.
Step 2: Upload Mockup in the Design and Price Tab
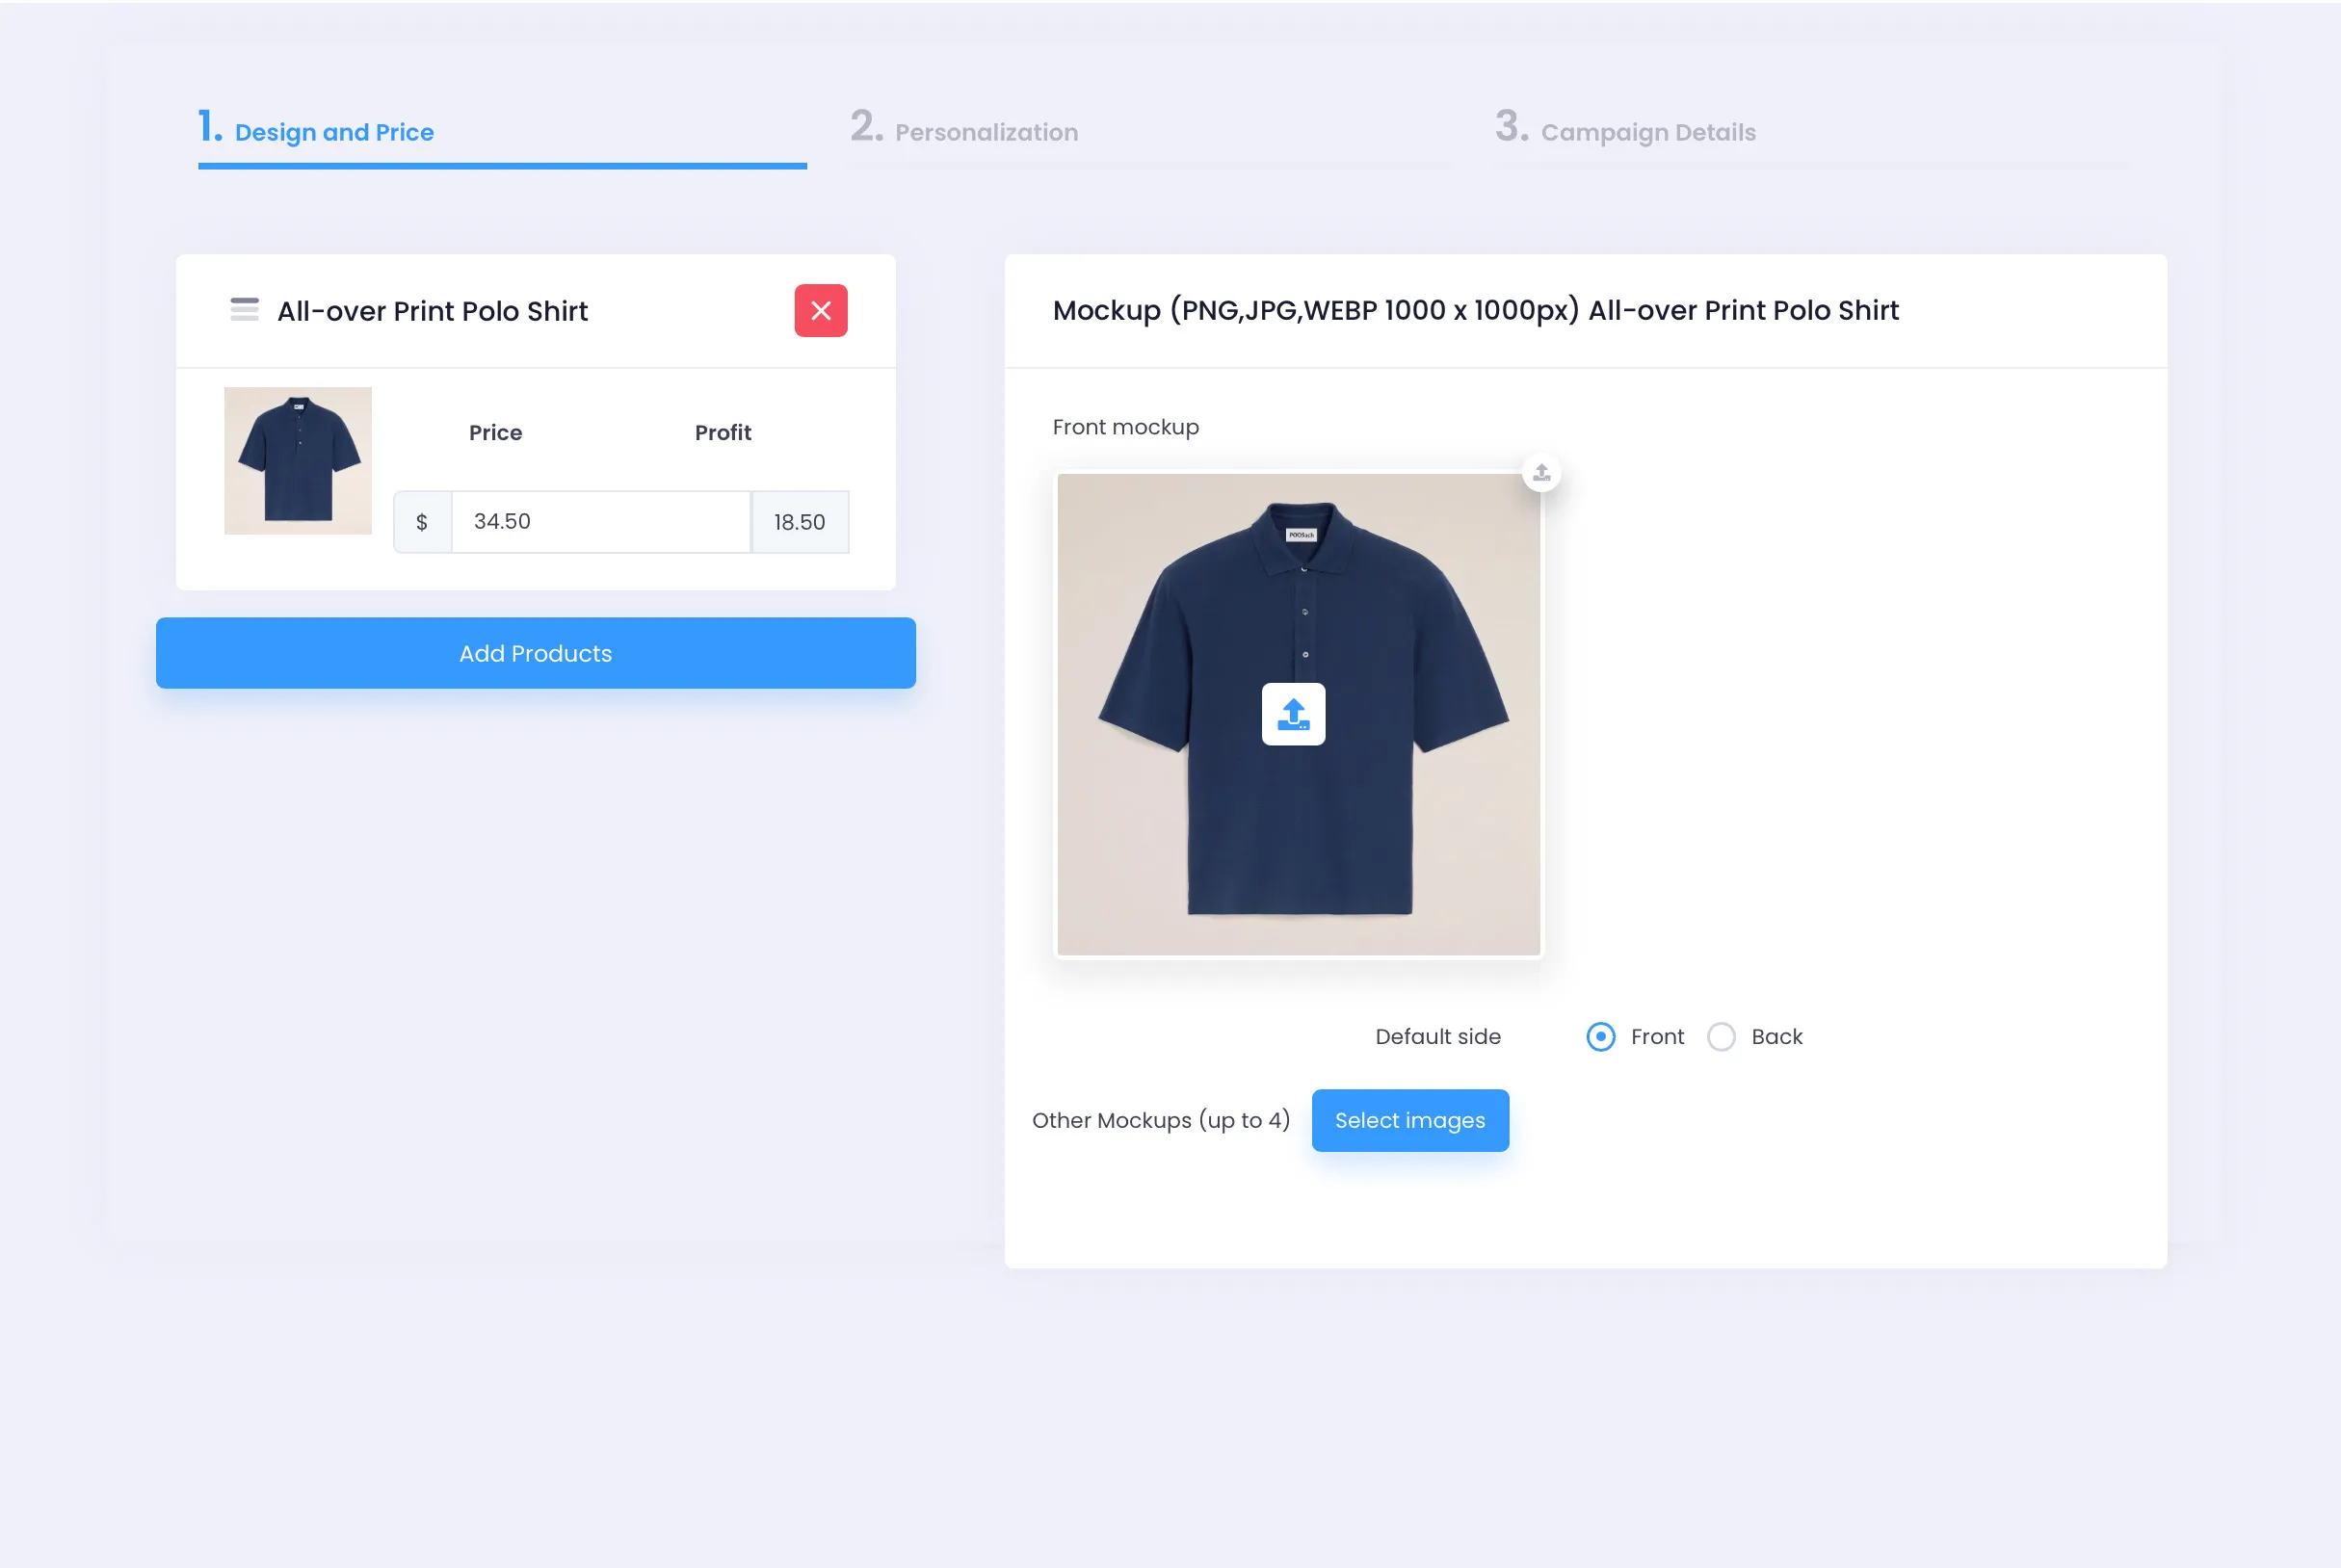
Section titled “Step 2: Upload Mockup in the Design and Price Tab”After selecting a product, you will be taken to the 1. Design and Price tab. Here, upload the mockup file for your campaign.
The result after a successful upload will look like the image below:
Step 3: Add a Custom Field
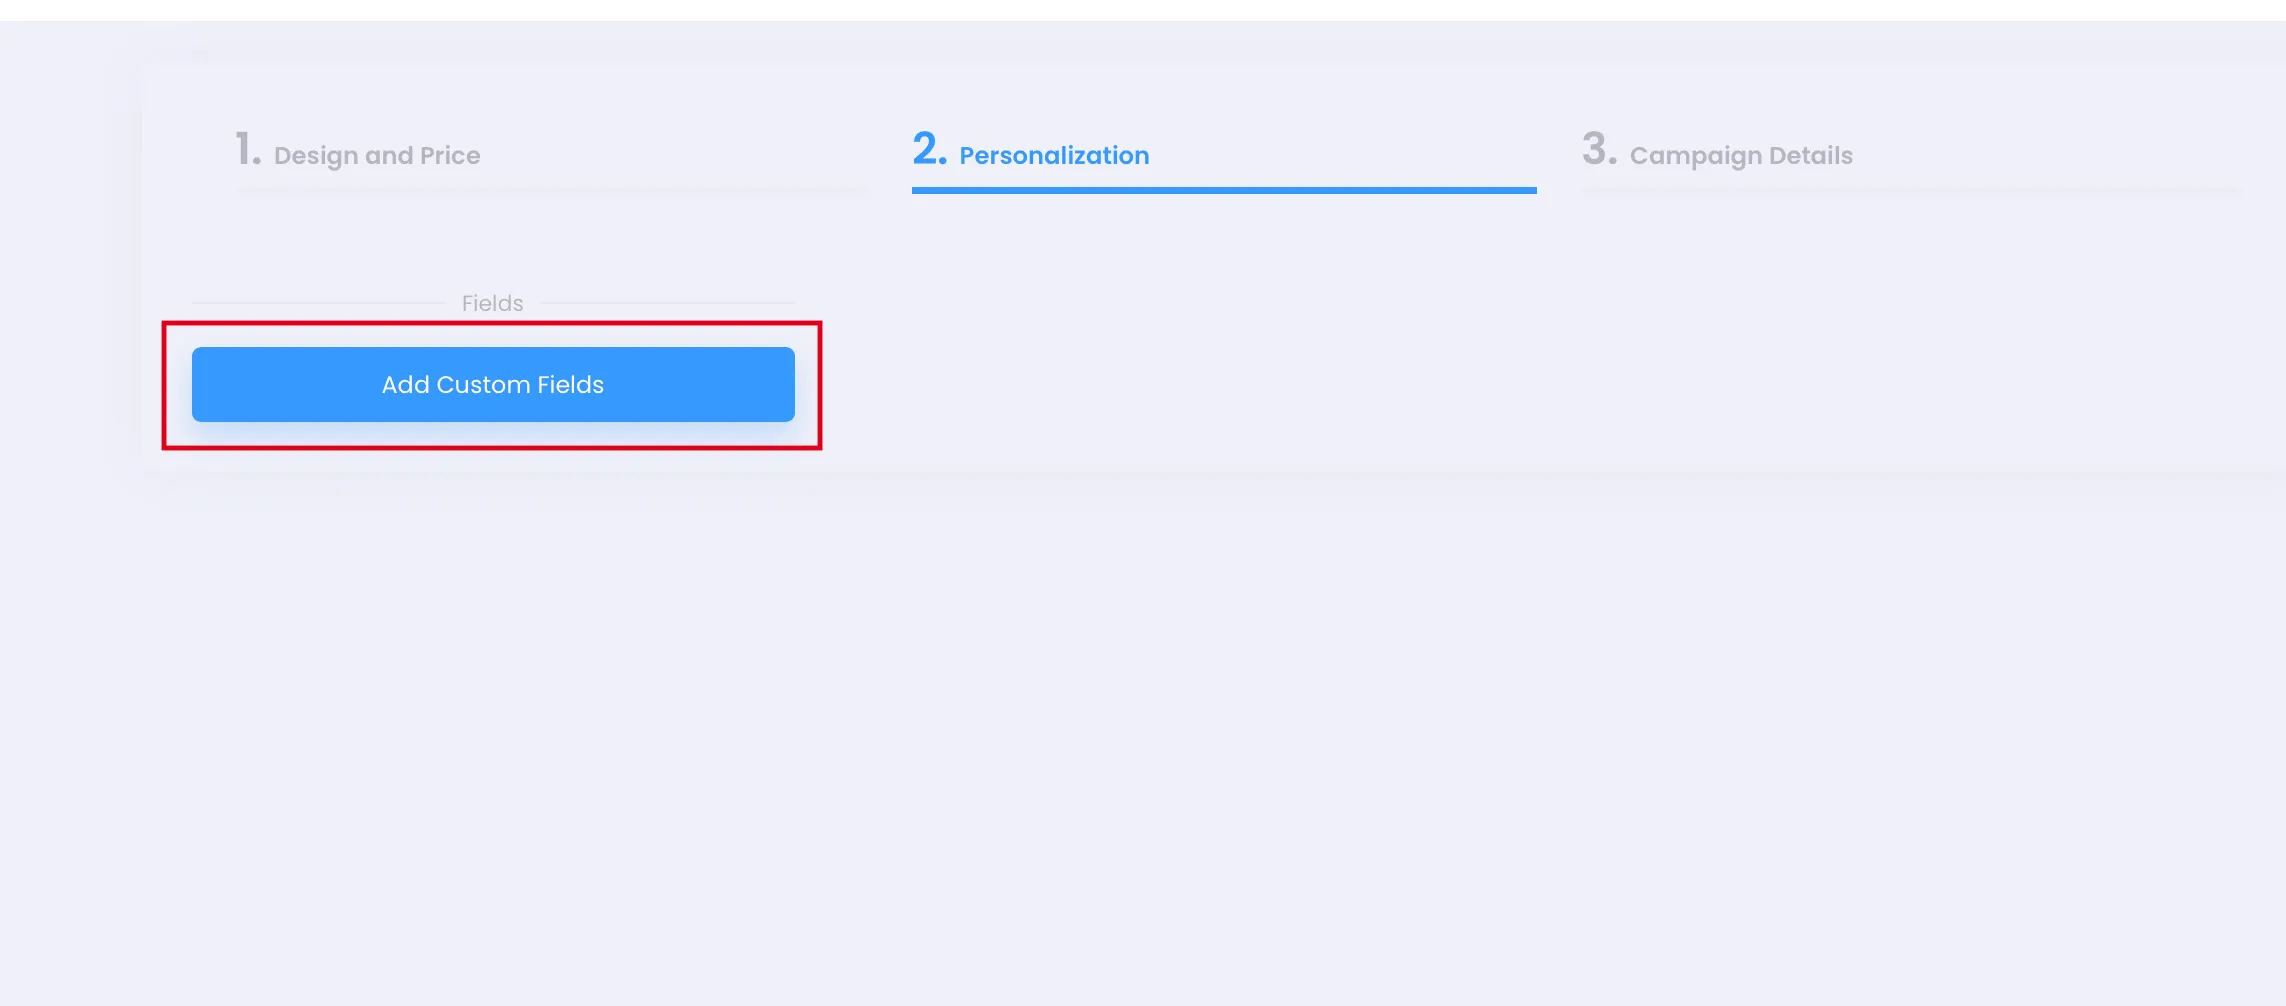
Section titled “Step 3: Add a Custom Field”On the campaign editing screen, switch to the 2. Personalization tab. Then, click the Add Custom Fields button.
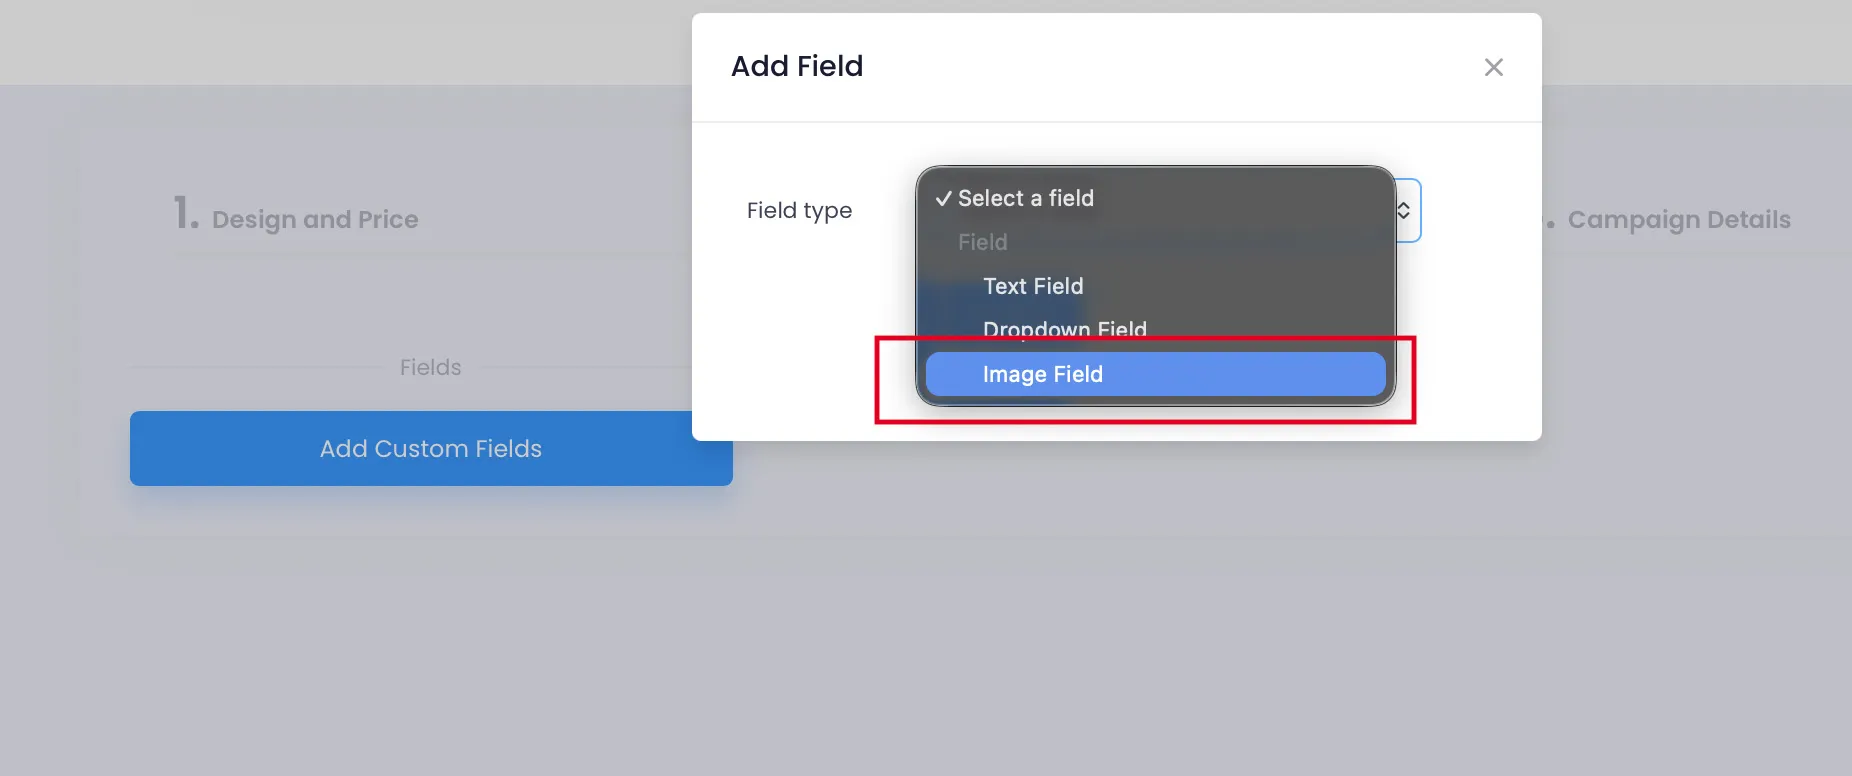
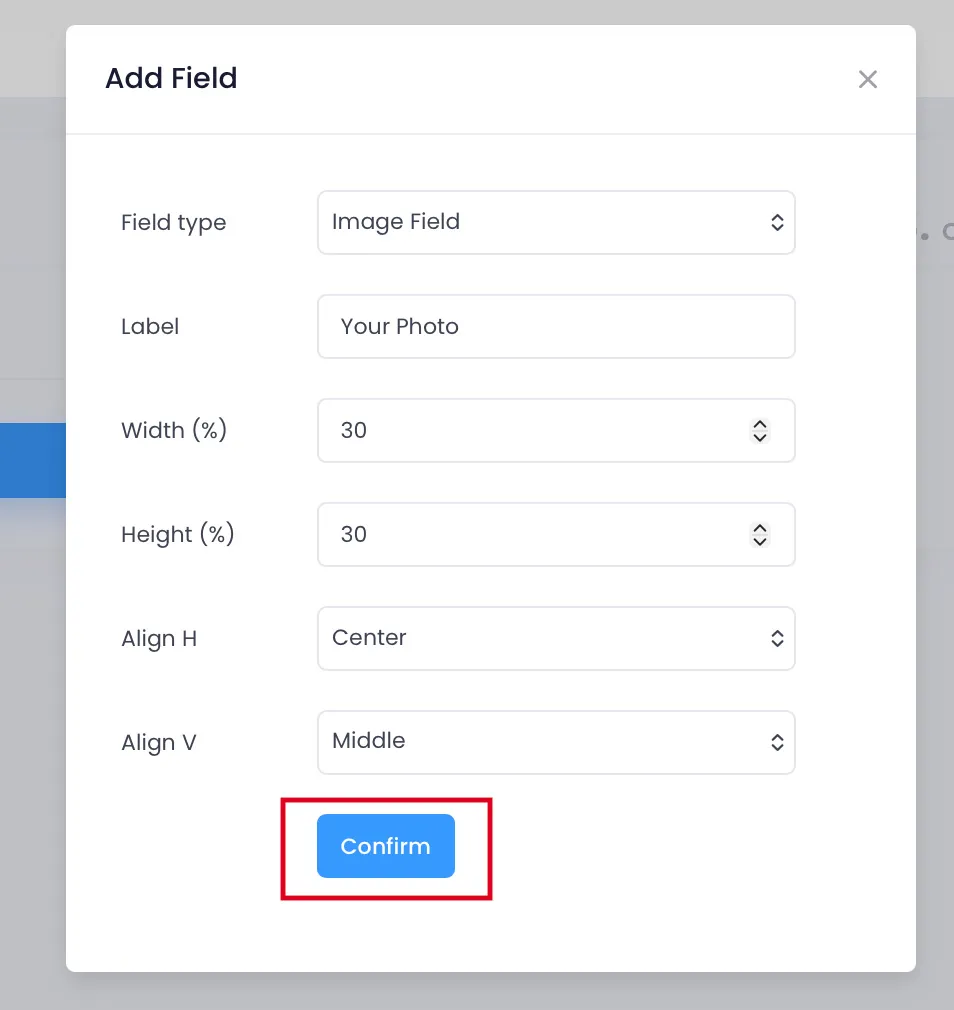
A popup window will appear. In the Field type section, click the dropdown menu and select the third item - Image Field - to open the detailed configuration panel.
Step 4: Configure the Image Field
Section titled “Step 4: Configure the Image Field”After selecting Image Field, the popup displays a detailed configuration panel. Fill in the following information to determine the position and size of the image upload area on the mockup:
| Field | Description |
|---|---|
| Label | Display name shown to sellers/buyers on the storefront (e.g., “Your Photo”) |
| Width (%) | Width of the image area, as a percentage of the mockup frame |
| Height (%) | Height of the image area, as a percentage of the mockup frame |
| Align H | Horizontal alignment of the image area within the mockup frame (Left / Center / Right) |
| Align V | Vertical alignment of the image area within the mockup frame (Top / Middle / Bottom) |
Finally, click the Confirm button to finish adding the field.
Step 5: Adjust Image Field Settings
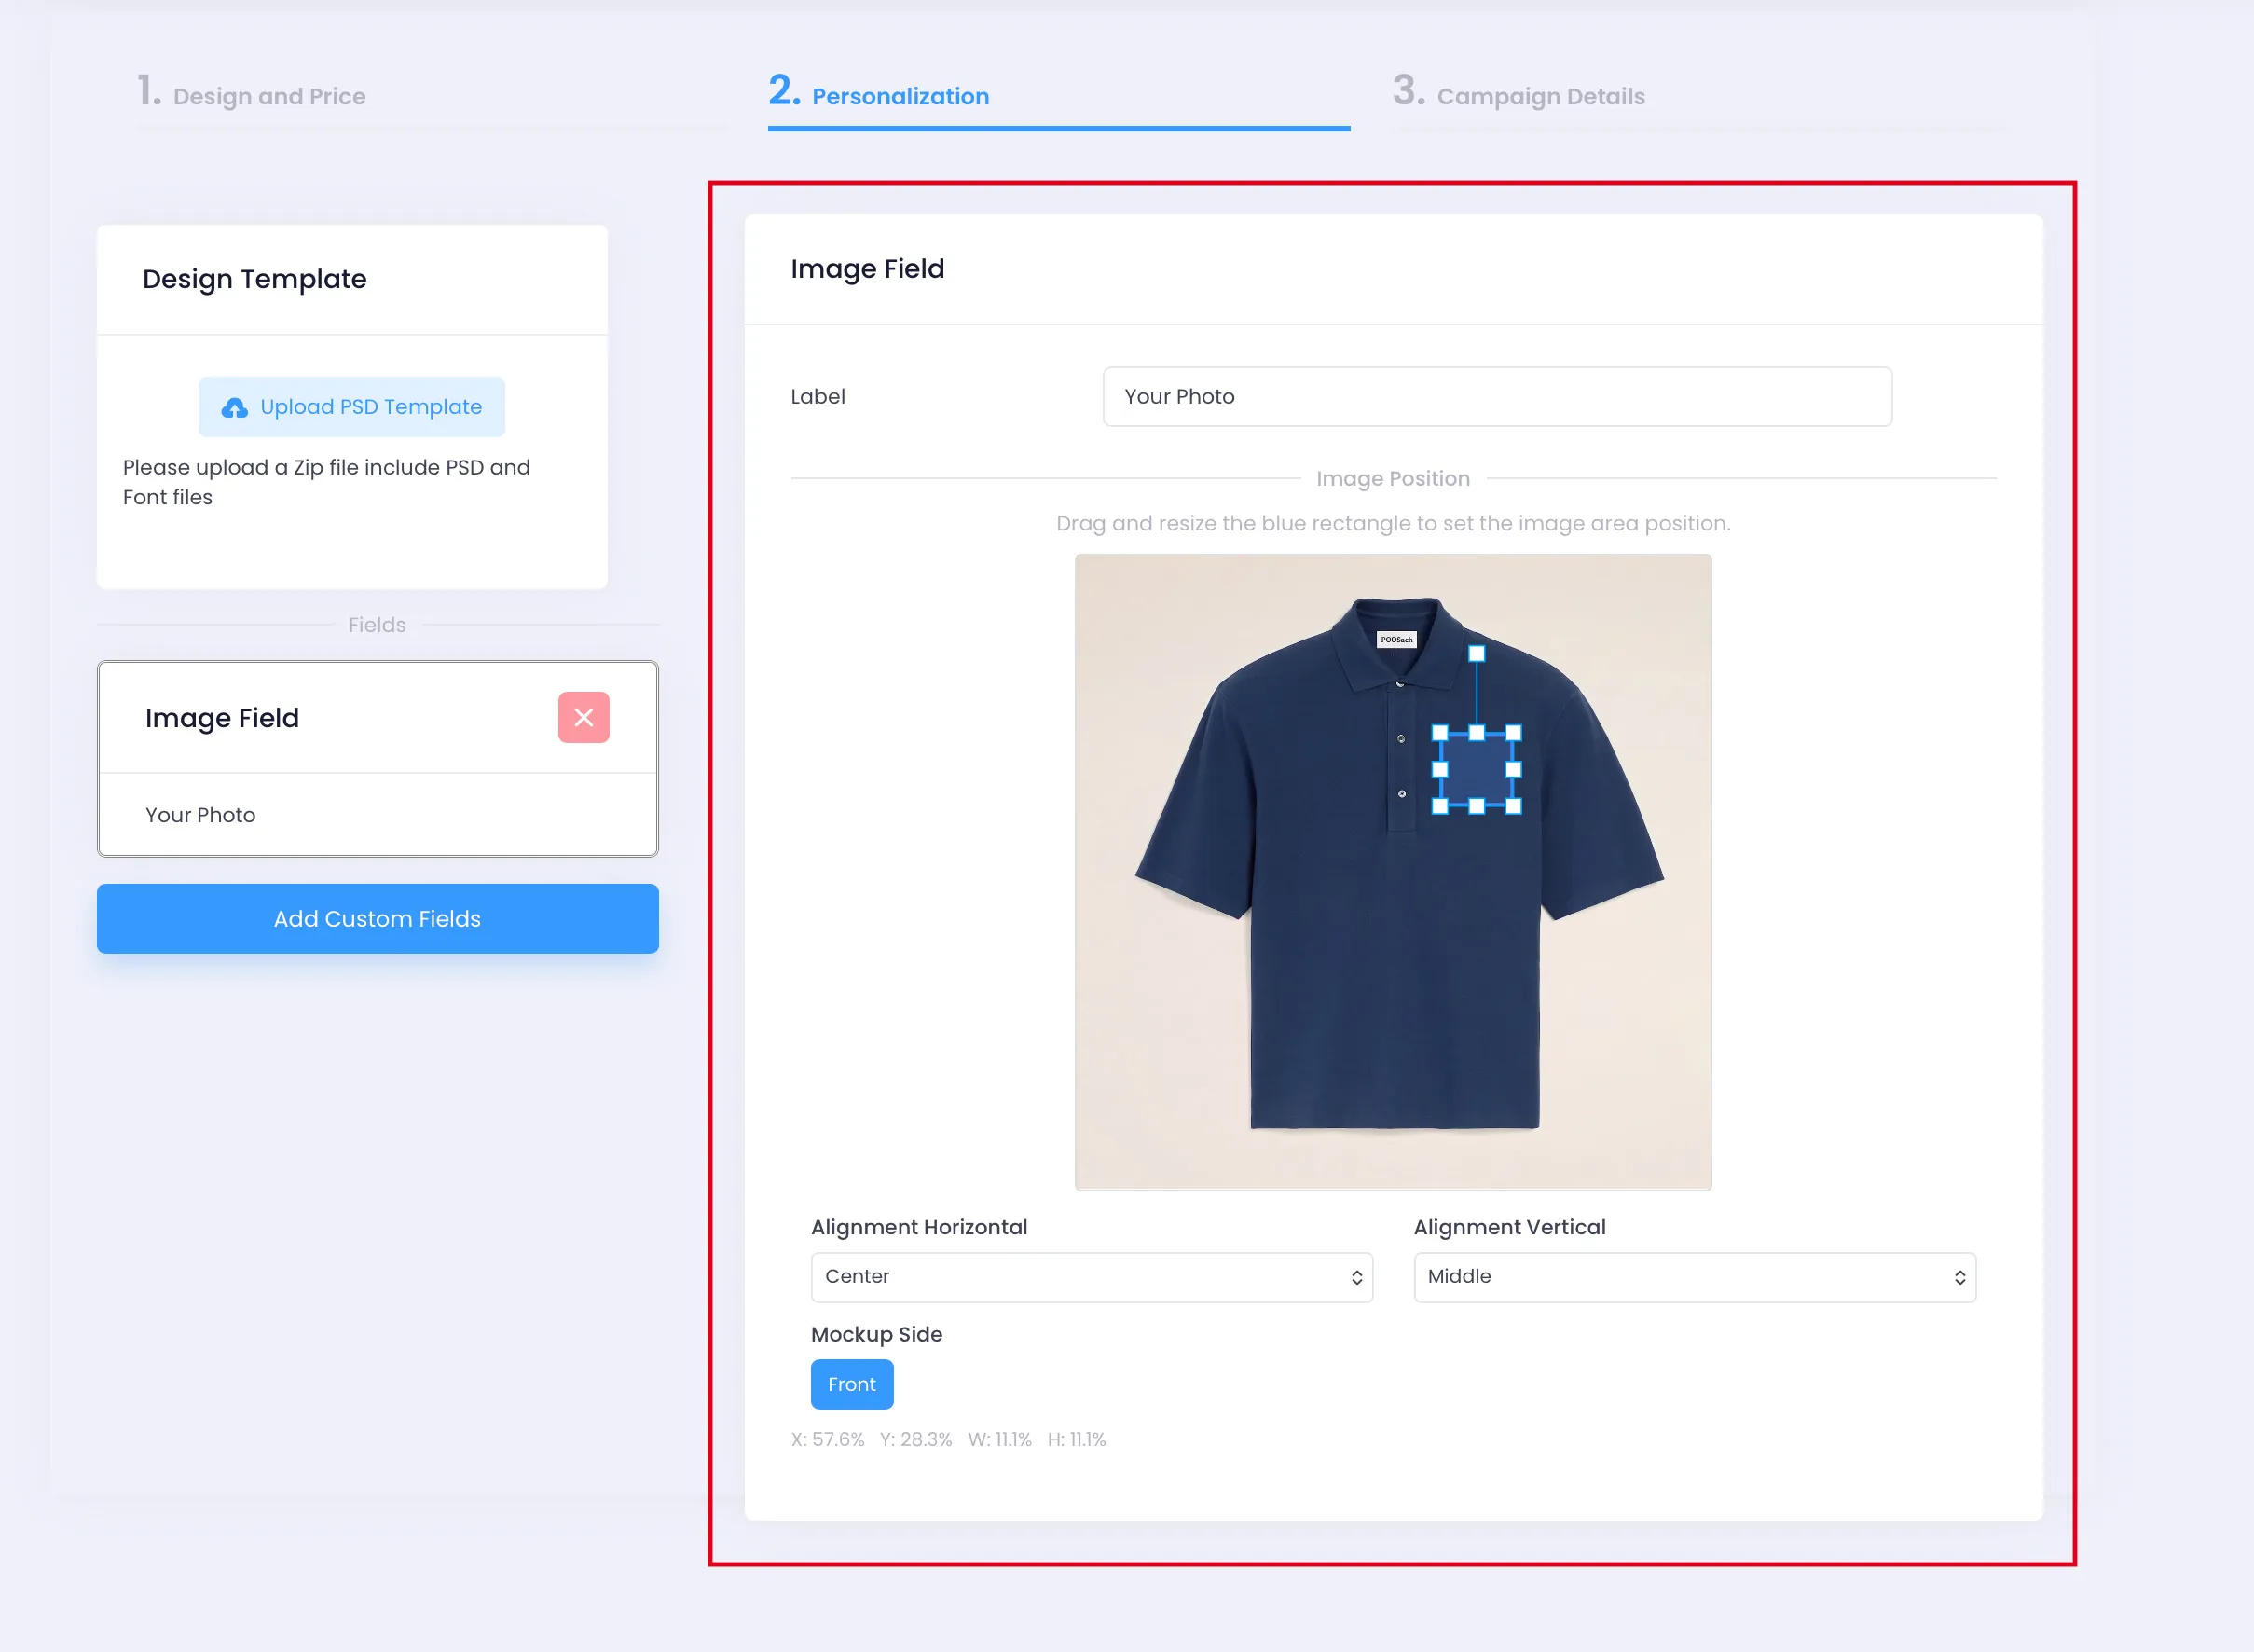
Section titled “Step 5: Adjust Image Field Settings”At this point, a detailed settings panel for the Image Field will appear. You need to fill in and adjust the following settings to determine the exact position where the image will be printed on the mockup:
- Label: The name displayed to customers on the Storefront. Example: “Your Photo”.
- Image Position: Drag and resize the blue rectangle directly on the mockup image to define the area where the customer’s uploaded image will be placed. This frame corresponds to the X, Y coordinates and Width (W), Height (H) dimensions displayed as percentages just below the mockup.
- Alignment Horizontal / Alignment Vertical: Align the image area horizontally (Left / Center / Right) and vertically (Top / Middle / Bottom) within the mockup frame.
- Mockup Side: Select which mockup side this image area applies to (e.g., Front, Back), as each mockup side may require a different image position.
Step 6: Finalize the Campaign and Preview
Section titled “Step 6: Finalize the Campaign and Preview”After configuring the Image Field, switch to the 3. Campaign Details tab and fill in the necessary campaign information (campaign name, description, pricing, etc.).
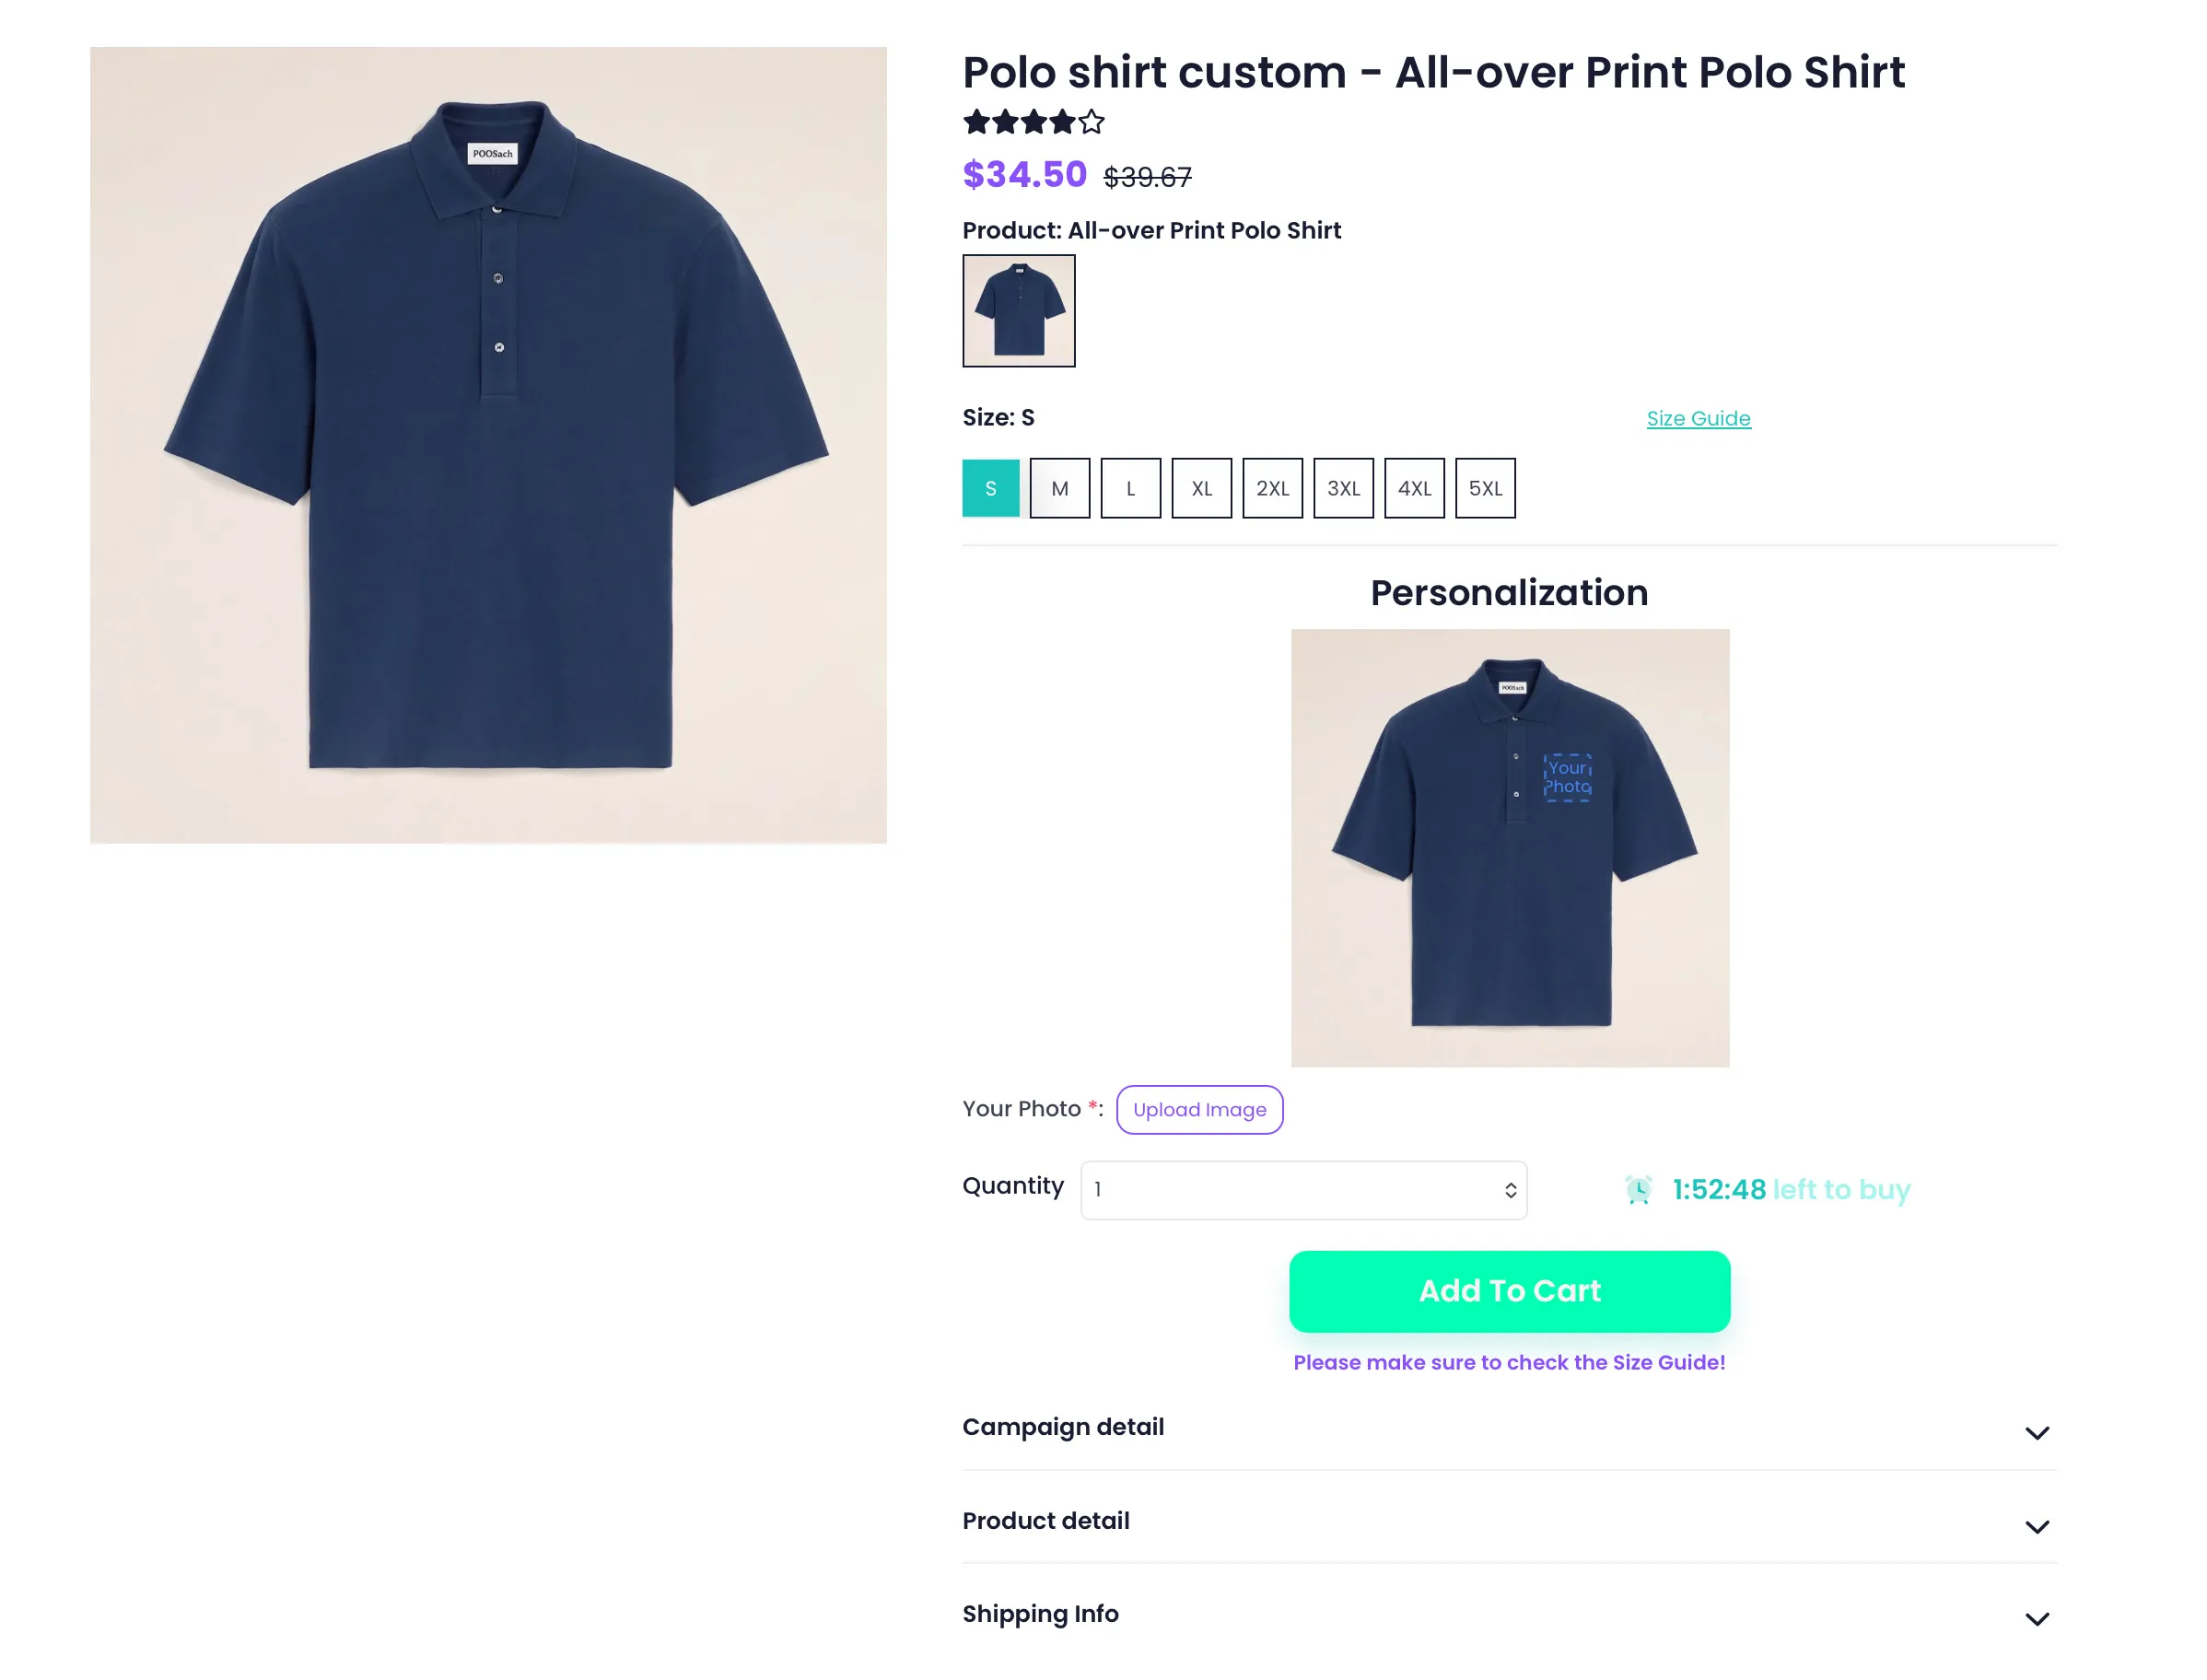
Then click Launch Campaign to finish. The custom campaign will be created as shown below, with the Personalization section displaying the Your Photo area in the position you configured, along with an Upload Image button for customers to upload their photo.
Step 7: Customer Uploads Their Photo and Previews on Mockup
Section titled “Step 7: Customer Uploads Their Photo and Previews on Mockup”On the Storefront page, customers click the Upload Image button under Your Photo to select an image from their device.
Immediately after a successful upload, the image is automatically displayed in the Personalization area, at the exact position and size you configured in the Image Field earlier. Customers can click Change to switch to a different image or click the trash icon to remove the selected image.
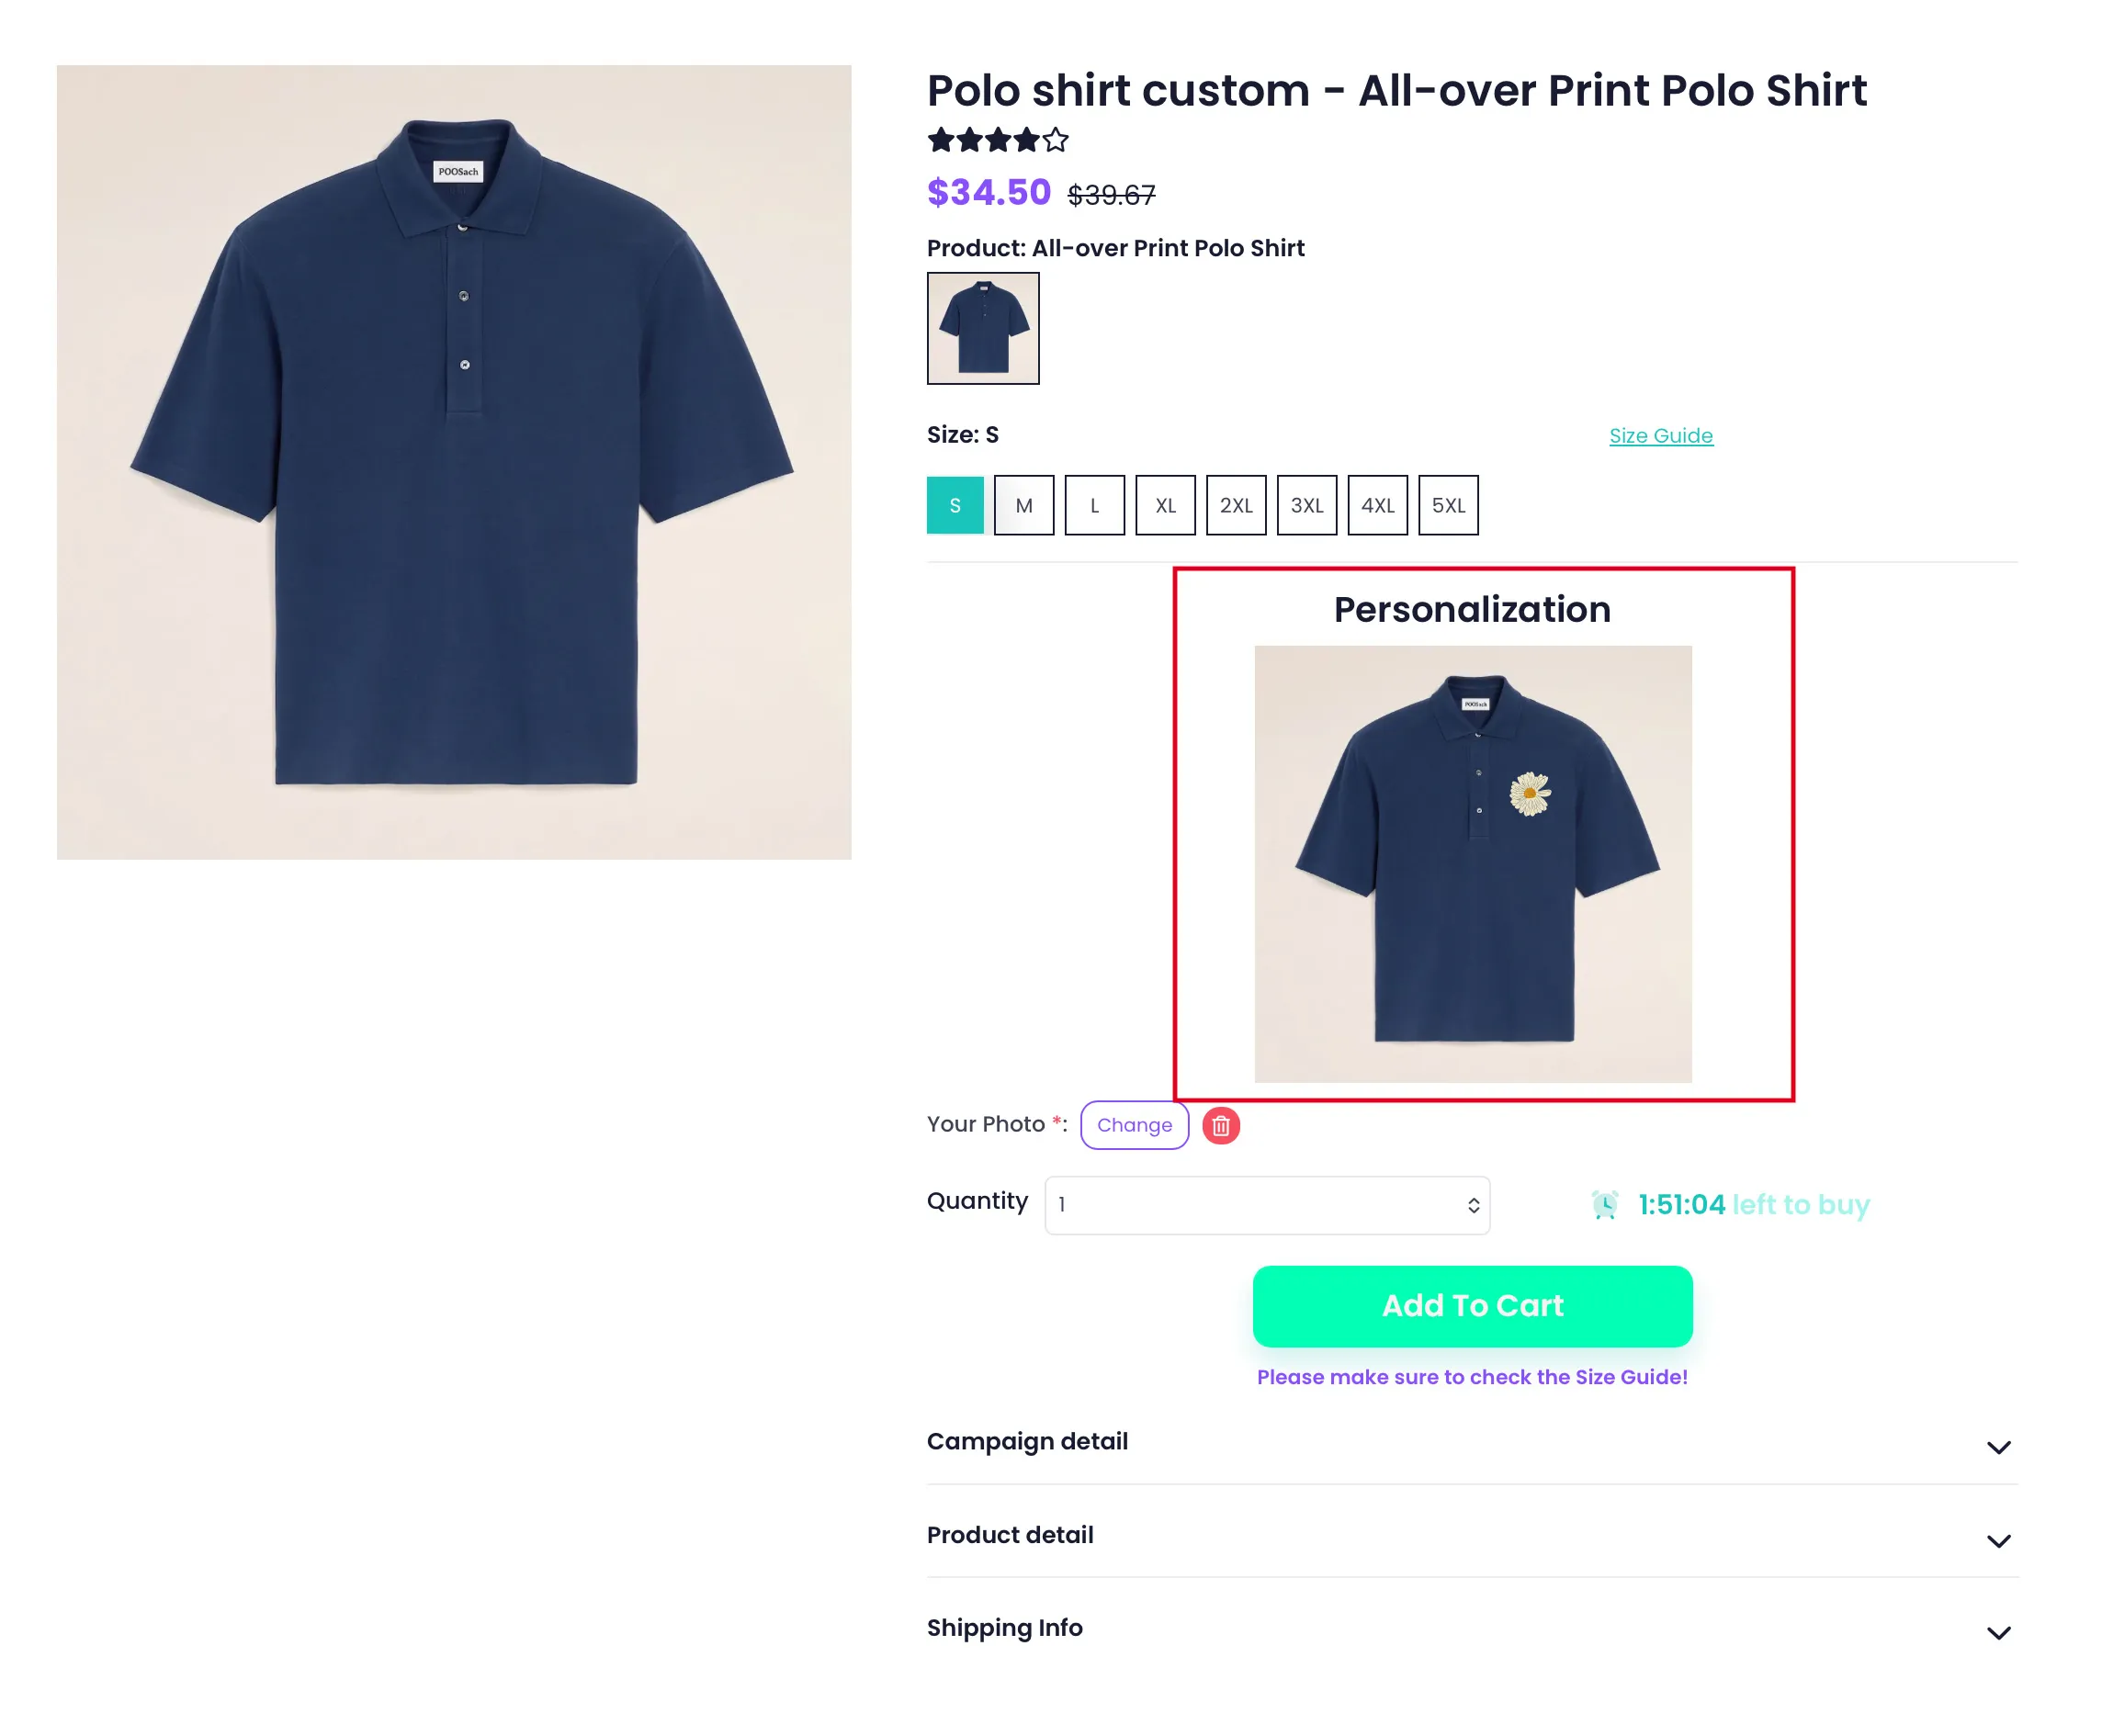
You have now completed adding an Image Field to your campaign, allowing customers to upload their own photos and preview them directly on the mockup. If you need to add other custom fields (Text Field, Dropdown, etc.) or encounter issues during setup, you can refer to related guides or contact the Support team for assistance.